TL;DR: This is a lengthy one, so as usual, I am including the code for this in my github repo here, for those who want to jump right in.
In my last post, which was also my first ever in this new foray into blogging, I described how to do single touch, bare metal rollouts with Ansible for more. . . hardware agnostic (we’ll call it) . . . rollouts.
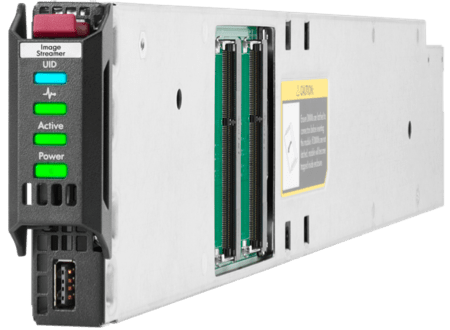
In this post, I am going shamelessly vendor-specific with the use of a suite of tools from HPE’s Composable Infrastructure. It includes HPE Synergy Frames and Blades, the HPE Oneview Appliance, the HPE Image Streamer Appliance, and use of the Oneview Server Profiles therein.
A disclaimer of sorts: I will not be going into deep-dive details about how HPE Composable Infrastructure works. I will give you the basics on the components as they pertain to the playbooks in the repo, but for a more in-depth look at the HPE products, please consult their documentation or use your google-fu where appropriate.
Let’s Dive In
As compared to using out-of-band management to boot from a customized iso, this time we’ll use HPE’s Image Streamer in conjunction with OneView Server Profiles (and Templates) to build the ESXi host. Once the host comes online, it’s a simple matter of getting the host into vCenter and configuring ESXi with your standard configurations.
Some Requirements
You will notice that I am including code from the HPE OneView Ansible repo. You are certainly welcome to use what I’ve included, but that code is not getting updates from its original repo. Therefore, bear in mind it may be advantageous for you to pull down the most recent modules from there. Other requirements for running the playbooks I have included are here in the README.md file.
HPE Composable Infrastructure Basics
In order to figure out how the playbooks work, you’ll need some foundational knowledge of the HPE composable infrastructure components. HPE’s Image Streamer uses a combination of some (dare I say) “old-school” technologies, such as booting from a Gold Image, and Open Source technologies like Redfish for automating and composing bare metal infrastructure. The overall process includes:
- Use of an ESXi Gold Image at boot time. For those of us who have been around long enough, you remember creating a golden image of an OS and then simply “ghosting” it onto the hardware? I do. Same concept here, only with the Redfish standard, automation choices abound. You’ll need to create this for the rest of this to work. No need to customize the OS though, in fact it is recommended to simply image a base installation and customize it at first boot through automation. Or . . . manually . . . if you prefer . . .
Sorry . . . I just threw up in my mouth a little there on the word, “manually”. . . Anyway . . . - Boot from SAN – The Gold image, aforementioned, boots from a LUN that is seamlessly accessed by each blade. This LUN is also RAID 1 protected across multiple Synergy Frames.
- OneView Server Profile Template – This contains all information for setting up the blade, including Network connections, storage connections and so on.
- OneView Server Profile – This is applied from the Template at boot time. This is created and applied to the blade when we run the playbook. More on that later.
- Image Streamer Plan Scripts – These contain the Redfish scripts that will be run at first boot of the ESXi host. These are highly customizable and very powerful. This is where
esxclicommands can be run, including setting up the ESXi scratch partition. If you are not familiar with Redfish, not to worry – Redfish allows for bash scripting blocks just fine. - Image Streamer OS Build – Centralized Operating-System specific parameters.
- Image Streamer Deployment Plan – The deployment plan brings all of the above together into a single Server Profile that gets applied to the blade.
A Short Digression about HPE Image Streamer Plan Scripts
Plan Scripts are important enough to have their own aside here. They are crucial to accomplishing what I would call the Holy Grail of Single/Zero touch provisioning. As an example, you can mix in Redfish variable calls as indicated by a variable name surrounded by @ symbols, (like @ScratchLocation@), with bash syntax to do tasks that can only be done through the command line, such as setting up the scratch partition. Plan Scripts run as the local.sh boot time script as a “run once” operation. The example from my prod code is below, and please note that other than the entry in the playbook for the Scratch Location, this code resides not in my repo but in the HPE OneView Image Streamer. Note also the line for the 3PAR SATP rule, which is from HPE’s 3PAR/VMware best practices guide:
echo @ScratchLocation@
# Scratch partition Setup - must edit for the cluster:
# The following lines will silently error out if scratch dir is not set and then keep the default:
mkdir "@ScratchLocation@"/.locker-"@Hostname@"  &> /dev/null
vim-cmd hostsvc/advopt/update ScratchConfig.ConfiguredScratchLocation string "@ScratchLocation@"/.locker-"@Hostname@" &> /dev/null

# Setup 3PAR Rule
esxcli storage nmp satp rule add -s "VMW_SATP_ALUA" -P "VMW_PSP_RR" -O "iops=1" -c "tpgs_on" -V "3PARdata" -M "VV" -e "HP 3PAR Custom Rule"
Back to the Playbooks and How They Work
Looking at the Ansible plays, there are 3 included in the repo I’ve shared (here it is again):
networksetfacts.yml– This one is here so you can pull the Network Set definition(s) from Oneview. You’ll need it to figure out two parameters in the main yml file (ManagementNIC.NetworkUri) and the (ManagementNIC2.NetworkUri).baremetalesxirollouts.yml– This declares variables and prompts the user for input, then calls the role you specify. By the way, remind me to tell you my thoughts on prompts in Ansible. . . . Another day . . .main.ymlunderroles/prod/taskscontains all of the meat of the yml tasks. I separated this from the main yml file for flexibility.- And as usual in most of my Ansible repos, I have a
varsdirectory that should be self-explanatory.
In the world of OneView, every network and storage connection must be defined explicitly in the Server Profile. Additionally, when you apply the Server Profile through Ansible, you will need to specify the network uri that each connection will get. If this is all a mystery to you, it might help for you to start by creating the Server Profile manually and applying it to a blade at least once so you can visualize this. Then come back. It’s cool. . . . I’ll wait.
How do you find the network uri? You can actually query for it through the HPE OneView REST API, but that’s another blog post altogether.
Or you could run the networksetfacts.yml playbook I have included to get the proper information. You are looking for the network uri for the network to which each NIC will be connected:
ansible-playbook -i inventory/hosts --limit localhost networksetfacts.yml --ask-vault-pass -vvvSide lesson – The --limit localhost is needed for me due to how my ansible is configured. Yours may not need any inventory specification at all. All of these tasks run as delegated to localhost.
Once you run the playbook, you should get something like what follows (this is truncated and scrubbed, but I’ll show you what you’re looking for):
ok: [localhost -> localhost] => {
    "ansible_facts": {
        "network_sets": [
            {
                "category": "network-sets",
                . . . .
                "name": "YOURONEVIEWNETWORKNAMEHERE", #<- Typically ESXi management!
                "nativeNetworkUri": null,
                "networkSetType": "Regular",
                "networkUris": [
                    "/rest/ethernet-networks/{SCRUBBED}-{UUID}-{NUMBERS}",
                    "/rest/ethernet-networks/{SCRUBBED}-{UUID}-{NUMBERS}"
                ],
                . . . .
                "state": "Active",
                "status": "OK",
                . . . .
                "uri": "/rest/network-sets/{UUIDNUMBERSBLAH}-123456789"
            },
You are looking for the “networkUris” section (highlighted). Those will be your two networks that will end up as NIC_Network_Uri and NIC2_Network_Uri in the shared_vars.yml file.
Next, it’s decision-making time. I have parameterized as much as I can, and as usual I have commented as much as I can throughout, but you will have to alter this to fit your environment. You will notice that I have included an option for the Scratch Partition (as detailed above). If you don’t have that, you should comment that out everywhere.
Now it’s time for “all the things”: Run the baremetalesxirollouts.yml file:
ansible-playbook -i inventory/hosts --limit localhost baremetalesxirollouts.yml --ask-vault-pass -vvvThe playbook will prompt you for 5 things:
- “Enter the ESXi Hostname:”
- “Enter the Management IP Address for the ESXi Host:”
- “Enter the vMotion IP Address for the ESXi Host:”
- “Enter the Blade location by Frame Name and bay number. Example: ‘MXQ917069G, bay 1’:”
- “Enter the vCenter Cluster name:”
You will notice that my “atomic unit” for this is the vCenter. That has been hard-coded; as has the vCenter Datacenter. Both of which are for the second part of the playbook. More decisions for you. . . .
The baremetalesxirollouts.yml calls the role you specify (let’s use prod as an obvious example).
The first Task in the roles/prod/tasks.main.yml file is using the oneview_server_profile module from HPE. This will “do all the things” related to the Server Profile. It connects to the OneView Appliance and creates the Server Profile with a combination of parameters from the Server Profile Template, prompts from the user, and explicitly-defined parameters in the module itself.
It then Powers on the server and waits for the ESXi Gold Image OS to boot with the defined settings from the Deployment Plan.
The Last Part – vCenter Import and ESXi Setup
Now that the ESXi Host has booted with a proper, DNS-resolvable Hostname and IP Address, Ansible can now import the host into vCenter and get it fully configured. If you read my previous post, the process is the same, except for one very important difference. After the host boots up for the first time, I do this (I changed the names of these tasks, just to see if you’re still paying attention):
- name: Placing host into maintenance mode . . . .
  vmware_maintenancemode:
    hostname: "{{ esxi_hostname }}.yourdomain.here"
    username: "root"
    password: "{{ esxistandardpassword }}"
    esxi_hostname: "{{ esxi_hostname }}.yourdomain.here"
    timeout: 3600
    state: present
    validate_certs: false
  delegate_to: localhost

- name: Rebooting ESXi Host . . .
  vmware_host_powerstate:
    hostname: "{{ esxi_hostname }}.yourdomain.here"
    username: "root"
    password: "{{ esxistandardpassword }}"
    esxi_hostname: "{{ esxi_hostname }}.yourdomain.here"
    validate_certs: false
    state: reboot-host
  delegate_to: localhost
So the Server Profile task gets the machine all up and running, and the first thing I do is put it into Maintenance Mode and reboot it? Why would I do that?
Well, as for the Maintenance Mode task . . . Why not? It’s the proper thing to do when rebooting a host and . . . I know this is a long shot . . . but what happens if there’s a VM on it because of some weird hostname mix up? You’ll notice the very last thing I do is take the host out of Maintenance Mode.
And why reboot a brand new host you’ve just built? Three words: Scratch Partition. . . . OK that’s two words.
I have about a 9-paragraph rant about the ESXi Scratch Partition. We go way back, the scratch partition and I. But, simply put we configured the scratch partition, but it does not take effect until after a reboot, so there you have it.
And Finally the Last Part
The remaining portions of the playbook bring the host into vCenter and fully configure ESXi:
- Adds the host to vCenter into the Cluster specified.
- Adds the license key to the Host.
- Adds vmnic1 to Standard vSwitch0
- Changes some Advanced Settings, including the Syslog Loghost
- Restarts syslog (required to save syslog settings).
- Sets Power Management to “High Performance”
- Adds a vmkernel port group for the vMotion interface
- Adds a vMotion kernel port with the proper IP Address
- Configures NTP, Starts the NTP Service, and sets it to start at boot.
- Adds vmnic2,vmnic3 to the vDS.
- Stops ESXi Shell Service and sets to disable at boot (Idempotent)
- Stops SSH Service and sets to disable at boot (Idempotent)
- Takes the host out of Maintenance Mode (Idempotent)
Thus ends this War and Peace post on Single Touch ESXi hosts with Ansible and HPE Oneview/Image Streamer. Questions? Hit me up on twitter @RussianLitGuy or email me at bryansullins@thinkingoutcloud.org. I would love to hear from you.
