So here we are. Morpheus. Part 3 of 3. In Part 1, I waxed philosophical about whether or not life is worth living VM Self Service. In Part 2, we talked about planning out your self service offering on Morpheus. Here, we finally do it.
A Couple of Final Disclaimers
- What follows here is not meant to be an exhaustive list of features; this is more of a case study. There are additional tasks/features that go beyond what is presented here, but with the standard Morpheus interface, it’s easy to extrapolate.
- Everything I am showing you here can be integrated into ServiceNow for self service. This is important because we started this blog saga over self service in the first place, which is powerful. But I just don’t have the space here to detail it. Consult your local ServiceNow Admin for details.
- Also, if you recall from Part 2, we’re building Windows VMs, but conceptually, it’s (mostly) the same for Linux VMs.
- Buckle up and coffee up, brothers and sisters, this one’s a lengthy one.
Once more unto the breach, dear friends, once more
. . .
Stiffen the sinews, summon up the blood.
. . .
The game is afoot . . .
Shout out to my fellow Shakespeare nerds out there. . . .
Our Case Study
As a reminder, here is the case study we talked about last time:
- In Morpheus (or ServiceNow), the user will indicate:
- User account(s) that will be granted admin access to the Windows machine.
- Choose a T-Shirt size for their VM.
- VM is created from a Morpheus-managed vSphere Template (same process as if it’s done manually, just done by a robot).
- The Morpheus Agent gets installed on the VM.
- VM/OS gets a regex-generated hostname with a numeric suffix incremented by 1 with each instance.
- VM/OS gets an IP address automatically from a Morpheus IP Pool.
- Once all of the above is in place, the server gets added into the AD domain.
- The Windows VM is added into SCCM/SCOM (or other for OS-layer management).
- Provision/Post Provision Scripts run on the machine (runs using a Morpheus Service account):
- Set Timezone (runs as a PowerShell script during provisioning).
- Specified user account is added in as a local Admin of the machine.
- Email is sent to user account that their machine is ready and indicates hostname and IP Address.
- The VMs data is entered into a CMDB Automatically using a REST API call.
- TearDown Script: Teardown script that will delete the user from the group(s) needed for local access runs just before the VM is deleted.
Putting it All Together
Here I will talk about creating some of the objects. In the interest of keeping things short, I am going to have examples of some of the items we mentioned in the Vocabulary section in Part 2, the rest are mostly rinse/repeat. I will show you:
- Morpheus UI Orientation.
- Uploading a vSphere Template as a Morpheus Virtual Image.
- Specifying Network/IP Pool.
- How to specify and run scripts.
- Assembling the Instance Type.
This tutorial assumes that you have done “basic setup” of the Morpheus Tenant, Cloud(s) (the vCenters in this case), and at least one Morpheus Group. Consult Morpheus documentation to get yourself up to speed. You will notice that when you create a Cloud in Morpheus (by “Cloud” we mean connecting Morpheus to your vCenters), many objects in vCenter are available for manipulation in Morpheus. You will see that in an ensuing section below. . .
Morpheus UI Orientation
Let’s focus on the portion of the UI we’ll be using so we can level set. Take a look at this:
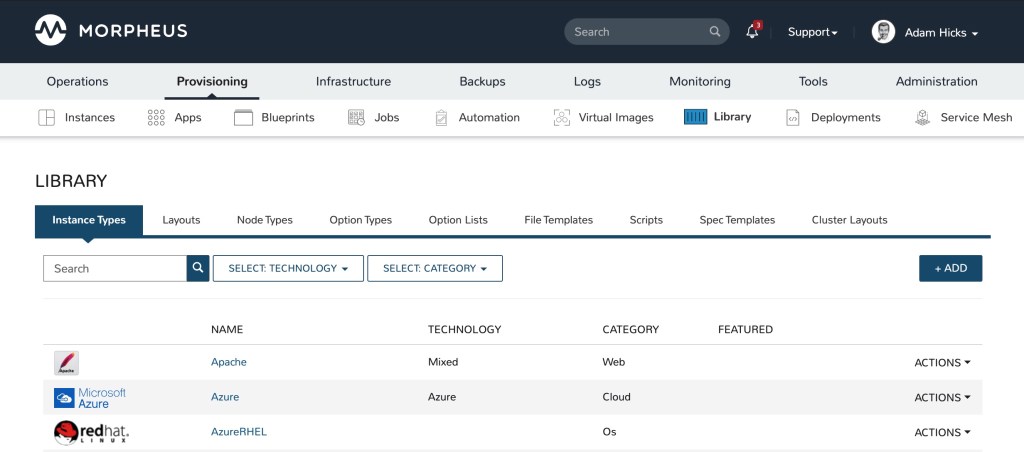
The Library is where we are going to be spending a lot of time. You get there by selecting Provisioning -> Library. From there, we have a lot of the vocabulary terms, aforementioned. And, pro-tip, it’s better if you create the objects you need right-to-left (for the most part). We’ll talk about this later.
But before we can create Library objects, we’ll upload the Virtual Image and setup a Network.
Uploading a vSphere Template as a Virtual Image
The first step is to create your VM Template. This is pretty straightforward, however you do not want to run sysprep on a windows machine. Also, if you are going to run the Morpheus agent, you will need to ensure that Antivirus is either disabled or not installed. In our situation, antivirus is installed automatically post rollout.
Once the template is created, I would recommend uploading the Template to Morpheus into the Virtual Images UI. This is optional, but has its advantages. It allows for Morpheus to have synced information with the template. The first time you use the Virtual Image, Morpheus will copy it out to vCenter and ensuing rollouts will use that template permanently.
To upload the template, you will need to convert it to a VM and Export as an OVF. Once you have downloaded the OVF file(s) successfully (if it’s a large OVF/OVA, I would recommend the more sure-fire method of using PowerCLI).
Once you have the OVF files locally, you will need to upload them to Morpheus (Navigate to Virtual Images -> [+ADD] -> VMware):
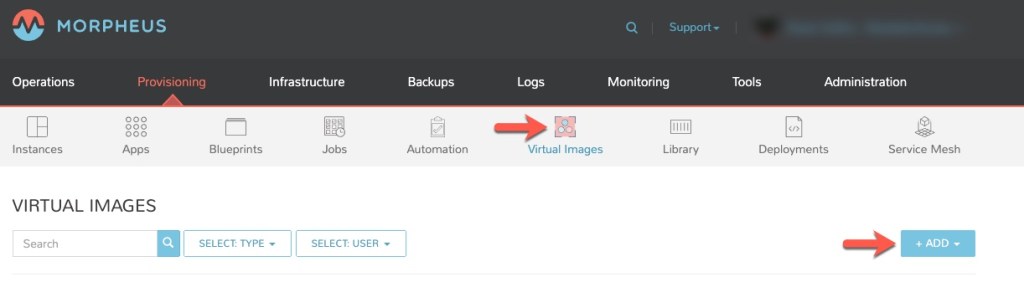
From here it’s filling out the items and uploading the files (what do you suppose “DROP FILES HERE” means? Hmmmmmmmmm.):

Give it a meaningful name, etc. You’re an adult, so I won’t go through each step.
But, one thing that struck me about Morpheus is what can only be described as “checkbox readiness”. There’s a checkbox. For installing the agent. Like. That’s it. And here, every time an Instance is created, the Morpheus agent will be installed. You don’t have to worry about it ever again. This flexibility and ease of configuration is everywhere.
Specifying Network/IP Pool
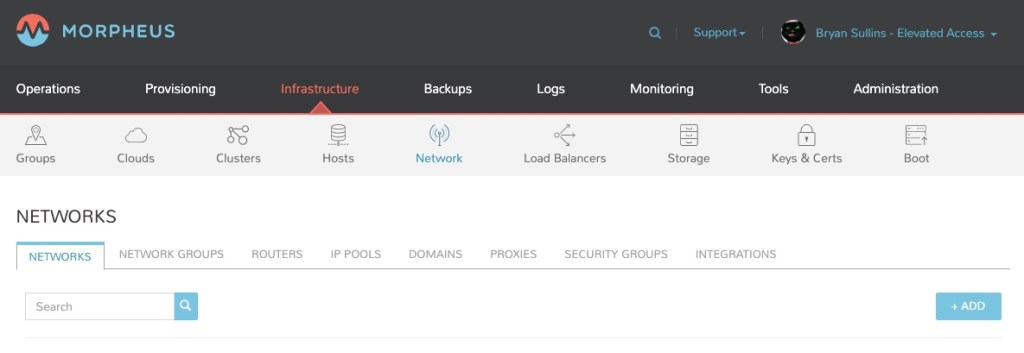
So, continuing this whole theme of a “Cloud Management Platform,” if you navigate to Infrastructure -> Network in the Morpheus interface, you will notice that all of the vSphere Portgroups have been synced up from vCenter. Assuming of course, you setup your vCenter as a Morpheus Cloud object:
Next would be associating an IP Pool with your various Portgroups. By default, everything is DHCP, but you can specify a range of IPs that will be used from the pool, starting with the first and incrementing by 1.
And if that’s not enough, you can always use some supported iPAMs, like BlueCat or InfoBlox (that would be on the Integrations Tab).
But, for this example, we’ll use what I call a Morpheus “Local” IP pool.
Select the “IP POOLS” tab and click the [+ADD] button:
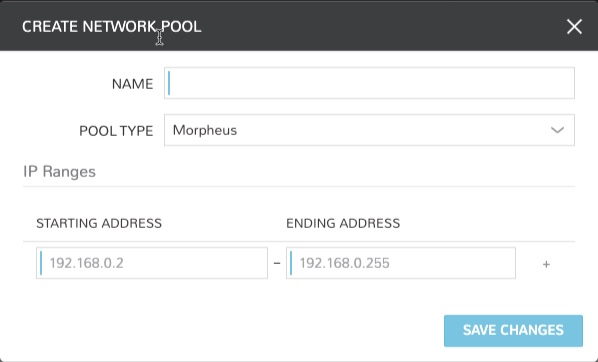
Give it a meaningful name and fill this out with a good and proper IP range, keeping in mind that the next step is to associate this IP Pool with a Portgroup.
Once complete, head on over to the Networks Tab and find your target Portgroup where these Self-Service VMs will go. Under that Portgroup’s Action menu, select EDIT. Once you do, you’ll get the opportunity to assign the rest of the network configuration. You know, stuff like subnet mask, gateway, dns, and so on:

Again, I will let you come to your own conclusions here. Easy peasy.
Specify and Run Scripts
So we have a Template, and we now have a Network with IPs. What’s left now is configuration through customized Powershell scripts. I won’t get sidetracked here with how to create those scripts; let’s assume you have created them and they are ready to be run at rollout. A couple of things you will need to figure out:
- From where will you run these scripts?
- At what step in the process? Pre-Provision? Provision? Post Provision? Teardown?
We opted to run these from within the actual created machine. It has its Pros and Cons, but it works for us.
So, the example I would like to use, is sending an email to the user who requested the VM at Post-Provision. This will email the user who requested the VM, and will let them know the hostname and IP of the new VM they requested, and announce that the VM is ready. It’s not pretty, but it gets the job done. This is the script, but notice the <%=customOptions.user_req%> line (highlighted) and I’ll talk about that on the other side:
$emailFrom = "fromyou@whatever.awesome"
$emailTo = "<%=customOptions.user_req%>"
$subject = $env:COMPUTERNAME+" is ready for use."
$body = $env:COMPUTERNAME+" is ready for use at IP Address "+$env:IP_PUBLIC
$smtpServer = "smtp.whatever.awesome"
$smtp = new-object Net.Mail.SmtpClient($smtpServer)
$smtp.Send($emailFrom, $emailTo, $subject, $body)
So most of this is pretty straightforward, but that <%=customOptions.user_req%> is a custom field (called customOptions in this case) that we’ve created in Morpheus, and this custom field gets passed in from Morpheus. It will also get passed out from API calls too.
This is powerful stuff because:
- You don’t have to create a mechanism to pass variables out from Morpheus. It’s already built in.
- Maybe you have custom data that needs to:
- Make its way into, oh I don’t know, vSphere Tags. Or . . .
- Make its way into a CMDB somewhere.
This would be how you do it.
So let’s get this script into Morpheus. Navigate to the Library and select the Scripts tab. Once there, click the [+ADD] button:
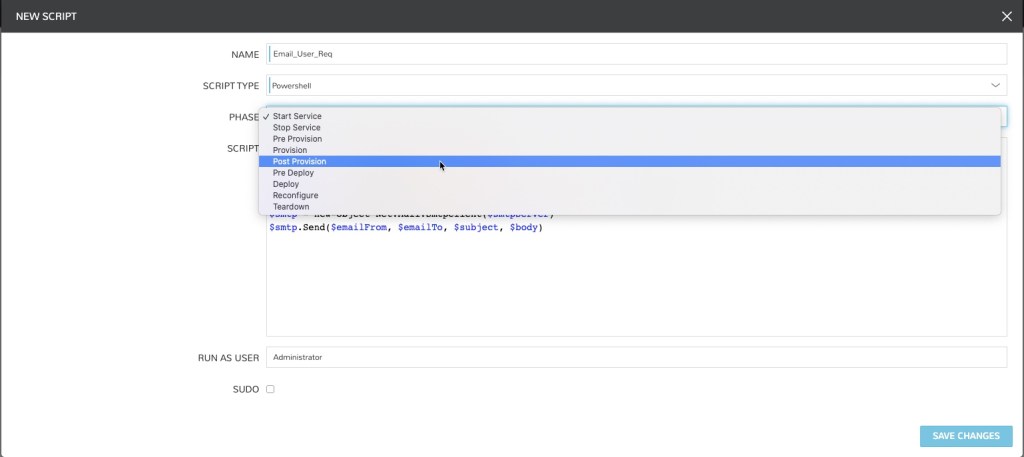
I included the various phases here so you can see the options available for when these scripts run, and for the record, I simply pasted the code for the script into the SCRIPT field.
Now that we’ve seen examples of the components for Morpheus, and these are just a subset of what you can really do, we’re ready to put all of this together into an Instance Type, which brings everything we have done so far into a UI that we use to build our VM.
Adding a Node Type, a Layout, and an Instance Type
Putting everything together, the last step is to assemble the Instance Type, which for our Case Study, contains at least one Layout, and a Node Type.
Here, we’ll start by navigating to Provisioning -> Library, and select the Node Types tab. Click the [+ADD] button and fill out the form here:

The main thing here is to select the VM Image we created earlier, and indicate your Scripts here, both of these items we created earlier.
One additional object is an Option Type (like the aforementioned customOptions.user_req). We haven’t really talked about this, but Option Types are additional, custom fields that can be entered into the Instance. These are added into, you guessed it, the Option Types tab in the Library.
Each Instance Type can have a Layout (which we’ve opted for here), so we can specify further fields like our Option Types , and which Node Type the instance will use:
Let’s create the Instance Type. Head over to the Instance Types tab, and everything should come together:

Notice that we are choosing a Category of OS, and most of the items here are self explanatory.
To specify a Layout, you’ll need to click on the link for the Instance Type, and then click the [+ADD LAYOUT] Button:


Note also that this is where you specify the Node Type we created earlier.
Note that you can do Option Types here at the Instance Type scope, if you like.
Once you click [Save Changes], we’re ready to create our first Instance!
Creating a Morpheus Instance
Navigate to Provisioning -> Instances and click the [+ADD] button. Select your newly-created Instance Type and walk through the Wizard.

I know you might find it disappointing to not see the magic happen, but this is where I have to leave you, for various reasons I can’t disclose here. But bottom line, it’s now a simple mater of filling out the forms in the wizard. Much faster than your traditional Make VM from Template action.
However, I think we have a good working Morpheus Instance . . . Happy instancing!
Hit me up on twitter @RussianLitGuy or email me at bryansullins@thinkingoutcloud.org. I would love to hear from you.

Hello, enjoyable read there!
How would we utilize packer in building virtual images in the Morpheus world?
LikeLike
I am not sure – I don’t use Packer for anything, but there are some references to packer in some of Morpheus’ documentation, so they are at least somewhat Packer-adjacent?
That is probably not a great answer, but it’s the best I can do, given that I don’t have packer skillz.
Thanks for reading!
LikeLike