TL;DR – DevOps people should at least read the disclaimer section (YADS: “Yet Another Disclaimer Section”), otherwise you will be profoundly confused. Otherwise, if you are comfortable with a loose definition of a “Pipeline”, skip down to the “Getting Started with Jenkins” section.

First: Allow Me a Brief and Reverent Aside for Eddie Van Halen
When I was a kid, there were two cassette tapes I played so many times they broke.
Yes. I said cassette tapes . . .
One of them was Metallica’s . . . And Justice for All. The other was Van Halen’s 5150. I remember every kid my age who picked up a guitar (I was more drawn to the bass) would always do the finger tapping that Eddie Van Halen made so popular.
His music brings back fond memories for me. Rest in Peace, Eddie Van Halen.
YADS: “Yet Another Disclaimer Section”
Anticipating my audience here, I can only assume I have some “for-realsies” DevOps readers. Although my work has some DevOps aspects, I don’t consider myself a “DevOps expert” or acolyte, as it were.
They don’t call it an “automation journey” for nothing.
Therefore, I hope you will allow me some loose creativity here in my use of the word “Pipeline”. I realize whole-heartedly that what I describe here isn’t a “true” Jenkins Pipeline (I am not using a Jenkins Pipeline Item, nor am I using a Jenkins file), but with the inclusion of SCM, git branching, and triggers, I think this could open up a lot of possibilities for those who have never used Jenkins before, which is the intended audience here.
So uncross your arms, un-furrow that brow, and pour yourself a drink. Relax.
Automation Pipelines: A Definition
In the context we are using it here, an automation pipeline means that with any series of automation processes, we seamlessly implement changes that will be integrated into the processes (the pipeline), without difficulty, disruption, delay, or headache. These pipelines can include processes such as:
- Multiple automation platform launches:
Launch OS build through Morpheus -> Ansible deploys apps -> Puppet (or whatever) - Add a Server into monitoring.
- Configuration changes.
- Automated testing and on that note . . .
- Canary testing.
- Whatever!
The key with pipelining, is that you don’t disturb any of the steps in the pipeline by making a change.
DevOps purist douchebags, how did I do?
The Power of Pipelines
We will be doing a very simple example in this post, but this leads to some very powerful and, dare I say, self-managing automation.
Configuration drift of your ESXi hosts keeping you up at night? Script out some PowerCLI that remediates it and schedule it in Jenkins to run at a regular intervals. And let’s make sure that the desired configuration setting is in a single variable.
Need to make a configuration change across all of your ESXi hosts? Sigh. Well I guess I have to script it all out all over again . . . or log into vCenter and change them manually like a jerk . . . right?
WRONG! HAVE YOU LEARNED ANYTHING FROM READING MY BLOG?
Just change the variable in your existing script, and then “pipeline” the changes to Jenkins through a git push, after properly testing it of course, or including testing in the pipeline itself. The next time Jenkins runs the code, it will re-configure your entire infrastructure.
You’re welcome.
Anyway, the scenario I describe is perfect for Jenkins, although we’ll be using a different example here.
Getting Started with Jenkins: Planning and Some Initial Advice
As far as installing your Jenkins server, I can’t really help you there. We just, like . . . have it . . . where I work. You’ll have to take a look at the Jenkins installation documentation.
Some tips and tricks:
- You will need to ensure that Jenkins has the proper plugins installed, such as PowerShell, git, and so on.
- You will need to ensure that Jenkins will either run powershell the way you expect it to run (install all additional modules you need on the Jenkins Server, along with PowerCLI in this case), or you will need to ensure that you code the script so it can run without prompts or interruption, this includes authentication to vCenter, etc.
- Keep in mind that you will need to keep “running directories” in mind. I spoil myself while running a script locally, with my own Powershell profile, etc. You will need to be very aware of where the script is running and if it calls other files, you will need to make sure they are correct; we will talk about this later as well.
- Have a good branching strategy for your git repos. You can use git tags too, but that’s not something we talk about here.
- Have a good testing strategy. Maybe you are still doing manual tests. That’s OK, but we will be pushing the code through git, which will then get run at some point after pushing to your repo.
Our Example and Adding a Freestyle Project
I figured we can use the script that we used during my last post; the one that automatically vMotions a VM for testing, but we’ll have to change a few lines to authenticate to the vCenter server non-interactively; we’ll get there, Padawans.
Entering Credentials:
This tutorial assumes you have the proper permissions on the Jenkins server (I have Admin perms because I am super cool), and that the proper Jenkins plugins are installed as well. Along with the aforementioned Powershell and Git, you’ll need the Jenkins Credentials plugin.
Before we can get down to business with Jenkins items, we’ll need to enter our Credentials for the git repo we are using and for the vCenter we are connecting through using Connect-VIServer. Navigate to Manage Jenkins and then select Manage Credentials.
Once there, Select the link under “Stores scoped to Jenkins“, and then Global Credentials (unrestricted).
Now in the left NavBar, click, Add Credentials:
Here you will enter your git repo credentials and give it an ID (no spaces allowed in the ID):

Click OK once complete.
Repeat the steps to Add another Credential, but enter your credentials for vCenter.
Creating a Freestyle Project:
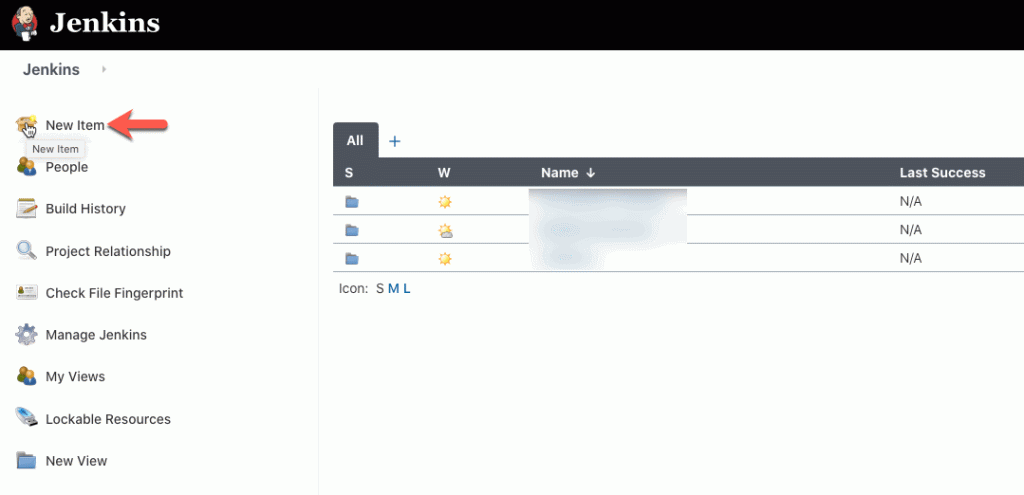
In the Upper Left Nav Bar, select New Item:
Next, we will create a Freestyle Project. Provide a Name and select Freestyle Project, then click OK:

Once complete, you should be at the configuration screen for the Freestyle Project:
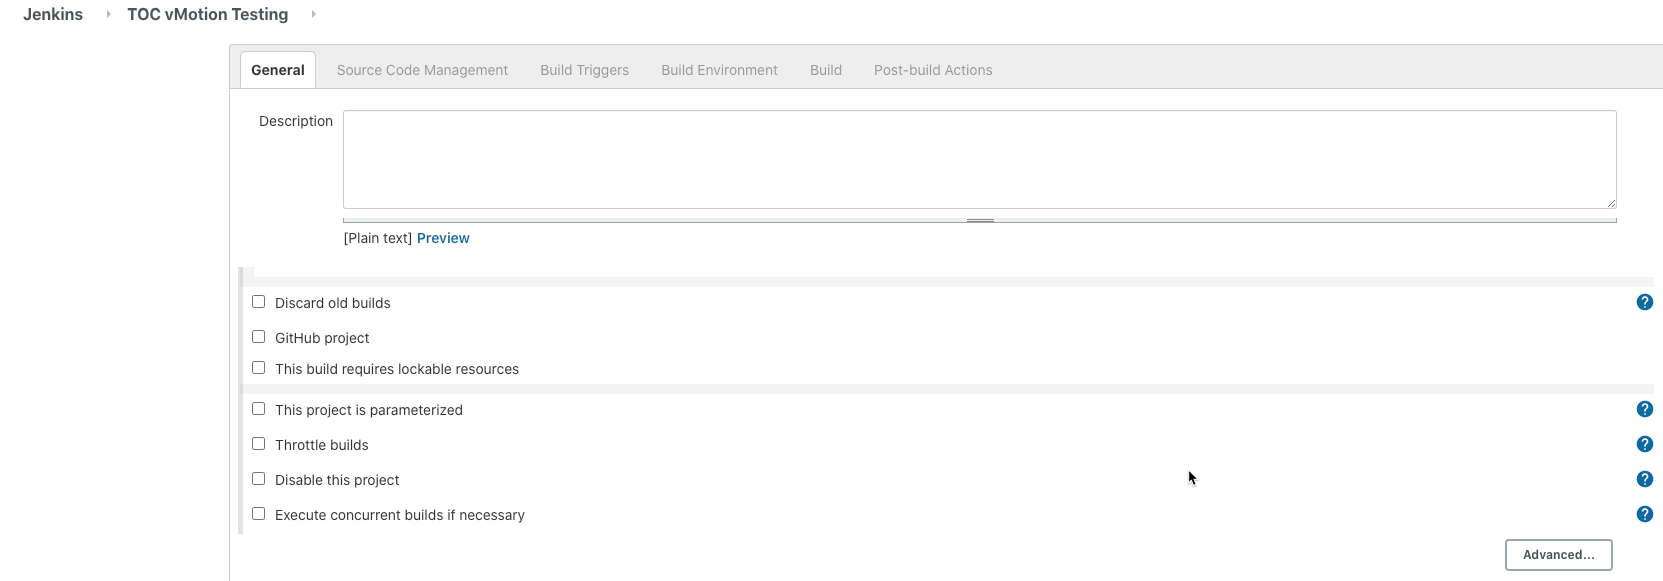
Enter a Description if you like, and you should.
Then make your way on down to Source Code Management and select Git. Plug in the Repository URL, and the Credentials we created in a previous step.
And then we get to Branches to build. The default is */master, but you should see some very cool possibilities here. Depending on your branching strategy, you can have a testing branch here, or dev branch, or a “limited” script build. Lots of possibilities here. I am leaving the defaults, but just keep that in mind.

The next section of note is Build Triggers. A pretty obvious one is “Build Periodically” which uses what can only be described as the “cron format” to run this when you so desire.
You will also see some other items, depending on the plugin; one is “Build when a change is pushed to Bitbucket“. As you can imagine, there are lots of possibilities here.
For now I am going to take the defaults:

Next will be to setup the Build Environment. Here, we are going to Use secret text(s) or file(s) and specify some variables to stand in for the username and password for vCenter, in this case.
So, under Build Environment, select Use secret text(s) or file(s) and choose Username and password (separated).
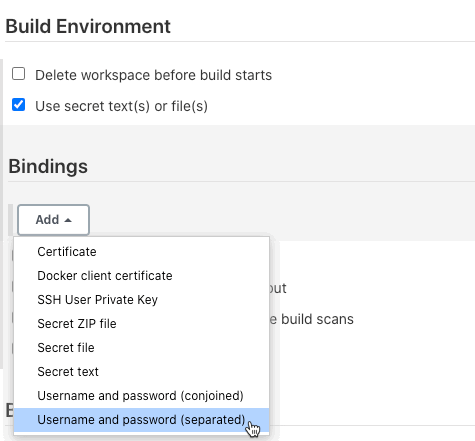
And once selected, enter a Username Variable and a Password Variable. I am using vcuser/vcpassword here, but it’s up to you as long as you remember them because we’ll be using them in the next step:

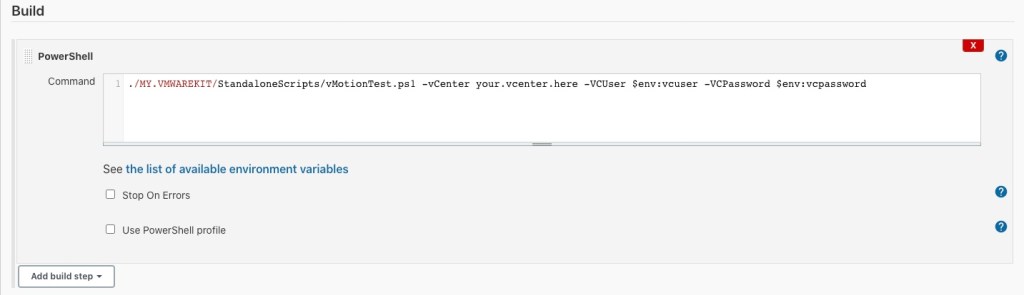
And finally, under Build and Add build step, we are going to choose PowerShell. Now you will see the ability to enter commands. I uncheck the Stop On Errors and Use PowerShell Profile.
But, more importantly, what you’re typing in here is the script name from the running directory where the script is located in your git repo. I am deferring the screenshot here for a brief aside. . . .
If you like, you can click Save at the bottom and then click the “Build Now” item on the NavBar. This will be fine since we have not set it up to run code yet. This will build your Workspace, which would be the root directory specified in the git repo. Once you complete your first build you can actually see the directories and files in the Workspace:
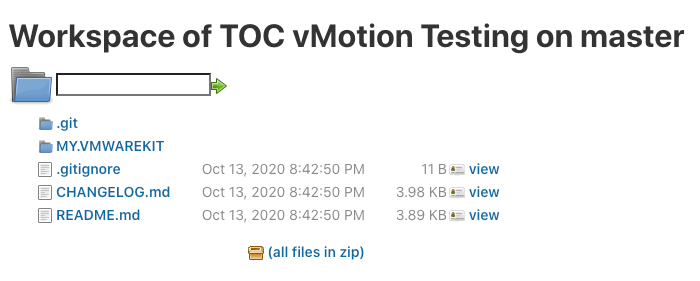
Hey look, it’s the files and folders from my GitHub repository! NOICE!
So when I type this into the Build section, I actually have to run it using the right path: ./MY.VMWAREKIT/StandaloneScripts/vMotionTest.ps1. Or, or have the script be in the root directory of the repo.
Additionally, I need to change the code so I can inject my Jenkins-aware username and password variables. So alter the script to look something like this:
Param(
        [Parameter()][string]$vCenter,
        [Parameter()][string]$VCUser,
        [Parameter()][String]$VCPassword
)
Import-Module ./MY.VMWAREKIT/MY.VMWAREKIT.psd1 -Global
Connect-VIServer -Server $vCenter -User $VCUser -Password $VCPassword -InformationAction Ignore
Note the importing of the module (you’ll need that). And, in the Command box in Jenkins, you can simply inject the vcuser and vcpassword you created earlier by using the $env: variable prefix (a Jenkins key word) to run the script so it doesn’t prompt for the user name and password:
./MY.VMWAREKIT/StandaloneScripts/vMotionTest.ps1 $vCenter your.vcenter.here -VCUser $env:vcuser -VCPassword $env:vcpassword
Note the $env: prefix, which signals to Jenkins that it should use the variables I setup in a previous step. Neato.
I have pushed the Jenkins version of the above already for you here.
So if you make your way back to the Configure section of the Project, bringing everything together, it should look like this:
Click Save, and then click Build Now in the left NavBar. If it runs successfully, you should see it in the Build History section under the NavBar:

While the job runs, you can also watch it run (or see errors if it fails), by clicking on the build while it runs in Build History (as in the screenshot above), and then inspecting the Console Output:

Now you can see the output from the script itself here (names of things redacted, of course:

One under-the-hood item of import is that when the Build runs, Jenkins creates a temp directory for it, then will destroy the temp version of the folder at the end of the build. So if you’re worried about passwords sticking around, everything goes away after the build is complete.
Changing Things Over Time: The “Pipelining”-Adjacent Part
What if you now need to perform this test on a different set of VMs? Well, you can do this by altering this line of code:
$vMotionTestVMs = Get-VM -Name "VMNAMEHERE"
And your choices are:
- Create a new branch and alter that line. Then create a new Jenkins Item, except specify the branch under the aforementioned “Branches to build” I raved about earlier.
- Branch it, test it, then PR/Merge the changes to master, and then you’re done.
Just to bring this back around to what I’ve blogged about before, this qualifies as Stage 3, if you’re keeping count.
You’re welcome, again.
Thus ends our Jenkins fun for the day. Questions? Hit me up on twitter @RussianLitGuy or email me at bryansullins@thinkingoutcloud.org. I would love to hear from you.
