If you are interested in why it has been so long since my last post, it’s mostly been a focus on my career.
Anywho . . .
Right off the bat, I can’t thank William Lam enough for all of the work he has done with home labs over the years, and what I am about to detail here is my lessons learned from his Minimal VMware Cloud Foundation (VCF) 9.0 Lab Setup, and more specifically his related git repo which I have forked here. He did all of the heavy lifting, I am just some a-hole architect (mostly) following his instructions.
There is a hardware BOM there, but you will find I have made some additional purchases because this is a greenfield lab for me. It has been over a decade since I have had a hardware home lab of any kind so I don’t have a rack and a KVM just sitting around in my garage like the rest of you home-labbers.
I forked William’s original repo so I could create my own adventure; I have my own goals and aspirations, most of which will be disclosed later in this post. I have made a conscious effort to avoid repeating William Lam’s content here, so this should have some additional information if you are looking to build your own lab.
Of course, my first goal is to use this home lab for learning and demonstration purposes. I have learned quite a bit already just by building it, so I am just getting started. Here is everything in vCenter:

I would also like to thank my wife who approved the budget for this project.
Without any further ado . . .
Step One: Realize This is an Investment
So yeah, this approach is not a nested solution on a single beefy host: it’s a (minimum) physical 2-node vSAN cluster built using the VCF Management Domain Model, so you will need the recommended 2 Minisforum MS-A2s at least. So if you don’t have any of the equivalent hardware on hand, the original BOM is just south of $4000.
But Bryan’s version went about $1000 over that since, as I mentioned, I didn’t have the usual accessories home-labbers typically have.

Also, for the maximum level of flexibility and future-proofing, along the way, I decided I wanted an independently running set of VMs for infrastructure automation and DNS, which brings me to another one of my aspirations: fully automated nukes and paves of my entire VCF 9 lab environment.
So I have an additional standalone ESX host I call my “ESX Automation Appliance” which currently runs my VCF offline depot and one of my two DNS servers because I just had to have two DNS servers.
I have big plans for this appliance, as you will see later.
For this standalone ESX automation appliance, I found the CWWK Alder Lake N305 with 32GB of RAM and 1TB of storage for an affordable price ($530) which should be more than adequate for my needs. The benefit here is that all of the hardware installs ESX 9.0.1 without any issues or workarounds, including two 10G-capable SFPs.
This appliance really makes my environment super flexible and offloads resource consumption away from the VCF cluster so it can focus on VCF-ey things. I highly recommend it.
Adding up everything over and above the Minisforum MS-A2s and the switch hardware from the original BOM, here’s what I went with:
- $530 – CWWK Alder Lake N305 with 32GB of RAM and 1TB of storage, but there is a bare-bones version as well, if you prefer.
- $100 – Tecmojo 12U Open Frame Network Rack.
- $24.99 – Tecmojo Rack Caster Kit. You can also buy the Tecmojo 12U rack with casters, but I wasn’t forward-thinking enough at the time.
- $55.00 – Tecmojo 9-Outlet Rack Mount Overloading Protection Circuit Breaker PDU Power Strip.
- $25.00 – Tecmojo 2 Pack 1U Server Rack Horizontal Cable Management with Cover,2.6“ Depth Plastic Cable Manager.
- $90.00 – Angeet KVM Switch 3 Monitors 3 Computers.
- $99.00 – Eyoyo 12″ Inch TFT LCD (OMG SO TINY!) Monitor
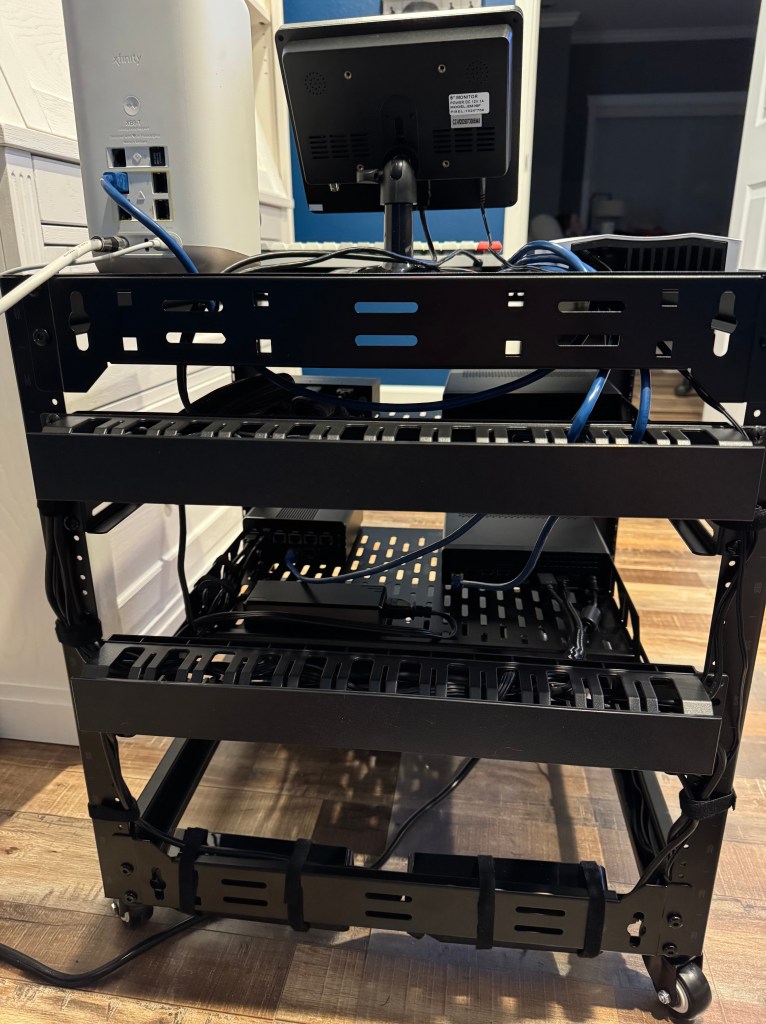
By my math, that’s $924.00 + tax. Here’s a nice family photo:

I also needed to purchase a few additional network, USB, HDMI cables, and I also used this project as an excuse to buy a label maker, but I am not counting those on the BOM.
I did have my old Vortex Race 3 keyboard sitting in a drawer somewhere, so that completed the ensemble.
I think the only flaw in my design is that I put the PDU on the bottom (I had my reasons!) instead of on the top. All it takes is one cat head-butt and it’s time for an outage!
The VCF Deployment
Yes, this was my first installation of VCF; I have seen it installed by other people, and actually used the product with our internal labs, but this my first official hands-on experience with a VCF installation.
One thing I found out about myself with this project is that I used to be a pretty hardcore RTFM guy. But it looks like I am not . . . anymore.
For the record, if this was a prod environment, I would have gone through the step-by-step with a fine-toothed comb.
But with this being a home lab with zero risk, I was both lazy and eager to get started.
So with the exception of the meticulously-followed Mikrotik switch setup, the rest of it I skimmed over and was like, “I see what you’re doing there. I get the gist . . . . LET’S DO THIS!”
That was a mistake. A few times I would run into the need for a workaround and I was like, “Hmmm, let’s go back to the . . . . ahhh right. He’s already accounted for that.”
That’s on me!
Some advice:
- Configure the MS-A2s as indicated in the ks.cfg files. If you don’t use the ks.cfg file, then you can copy and paste most of those commands into the ESX host after first boot through SSH, it will just require at least one additional reboot. Note the ease with which Memory Tiering is enabled.
- If you don’t have a DNS server, use the recommended unbound. As DNS servers go, this is the easiest I found, by far.
- Use the offline depot. Not a requirement (to my knowledge), but I have found that getting artifacts to the SDDC Manager are faster and easier. This will also be easier for you to manage in the long run.
- When deploying VCF using the JSON file, don’t have any VMs on esx02. The deployment will fail with the error (paraphrasing here) “VMs have been detected on esx02. . . . ” Lucky for me it just meant a vMotion and a shutdown of my secondary dns server (I played it safe from a resource consumption standpoint). This prompted me to get the aforementioned CWWX automation appliance.
- I ran into this issue: “VCF deployment fails on “Deploy and configure NSX” when the “Configure NSX Backup Schedule” task fail”. Apparently, in some cases the backup account password on NSX isn’t synced with the back up account on the SDDC Manager, so you have to set the backup account password to match and then reset
faillock.
I figured that last one out on my own with the help of the KB article, because I am like, awesome and stuff.
Outside of the above, the installation was otherwise flawless.
My Big Plans
I already checked off one on the list, which is use Lifecycle management in VCF Ops to upgrade ESX. Blog post to follow.
In no particular order:
- Some sort of directory service with an identity provider. Maybe OpenLDAP with Keycloak, but I haven’t decided yet.
- Also, a CA like step-ca.
- Iterations on automation, starting with ensuring my USB ESX installations have a good and proper automated ks.cfg installation (I opted out the first time, but this would be the first step in a nuke and pave situation).
- This list here.
- Install VCF Operations for Logs and Networks.
- Setup VCF Automation with the VM Service and then automate some VM and Kubernetes use cases, including using Packer for image creation and some other automation engines.
- Dive Deeper into VKS and AVI Load Balancer.
- OH! Also install AVI Load Balancer.
- VCF Data Services Manager.
And that’s just a start.
Let’s finish out with some more lab pics. Here’s the obligatory before and after cabling pics:

One final picture: the MS-A2 NVMe installation:

Hit me up on Bluesky @realbryansullins or email me at bryansullins@thinkingoutcloud.org. I would love to hear from you.

Cool stuff
LikeLike