

I know, I know. It has been a while. I have no excuses: I just took a self-imposed, un-announced break.
But now I am back, TOCers! . . . . Does that nickname work? Can I call you that? It’s a thing I’m . . . you know . . . trying out . . .
Maybe we should have a vote? Like maybe we pronounce it “TOKers”. Or maybe we can fit the whole running joke about binge drinking in it somehow? Hmmmmmm . . . something to think about.
Anyway, it occurred to me, after gaining 94 Followers (thanks for that) and making 36 total posts on this blog, that I have made some references to Ansible AWX (or just AWX, if you prefer), but I have never actually made a post about it.
Which is strange because it has become one of our main automation platforms, in tandem with Ansible itself.
What does AWX bring to the table?
- GitOps Readiness – AWX will sync with your git repo(s).
- Standard GUI for Running Ansible Automation – This makes it easy for consumers of your automation to run Ansible playbooks. Not everyone is going to run Playbooks from a Linux command line. Additionally, security-wise, you may not want that. If you want to . . . BUZZWORD ALERT! . . . “run this at scale,” meaning you want as many people running this as possible, this is the way to do it.
- Scheduling – Your Ansible playbooks can be scheduled more robustly than with something like cron.
- Workflow Creation – This allows for you to create a Workflow that will “string together” multiple Playbooks to run in succession, or simultaneously, if you so choose.
- Built-in Notifications – AWX will let you know if a Job has run successfully or if it has failed.
- REST API Abilities – AWX capable playbooks (Templates) can run from an API call, opening up a lot of . . . . ANOTHER BUZZWORD ALERT! . . . “Self-Driving Data Center” capabilities.
Oh Right, I Forgot to Tell You What AWX Is . . .
From the link, as above:
“AWX provides a web-based user interface, REST API, and task engine built on top of Ansible. It is the upstream project for Tower, a commercial derivative of AWX.”
In other words, to be blunt, it’s the “free” version of Ansible Tower. However, as you can surmise, that means no support. I would highly recommend that if you want to be successful here and run this in production, you will need the (Linux/Apps) talent to maintain it. Thankfully, where I work, we have that.
Let’s Dig In
The first observation I can give you is that AWX is, for the most part, intuitive.

Case in point: I am not going to talk about Users and Permissions, because those seem highly intuitive to me. This tutorial assumes that you have Admin permissions to your AWX Organization.
Prerequisites and Vocabulary
Prerequisites
- Organizations – Outside of the need for permissions, you will need to be associated with one Organization. This is a subset of users. A “Group” as it were. You can create an Organization for the Network team, for example. Any accounts in the “Network Organization” can only see their Ansible objects.
- Git Repo with Working Playbooks/Inventories/etc. – One piece of advice is that you will need to test and debug the playbooks you intend to run using a separate good ‘ol Ansible server. That’s the way we do it, anyway. And since you are testing/debugging elsewhere, you will need . . .
- Like-for-Like Ansible/Python Modules That Match What You Have During Testing – Some of your Ansible modules may go beyond what’s in the default version of Ansible. If so, you’ll need to document what those are (
pip3 freezeis always handy) and ensure they are also installed on your Ansible AWX machine. Contact your local Linux Admin for details here.
Vocabulary
There are a few objects in AWX that you will need to know and get setup:
- Credentials – The usernames and passwords needed for all of the various components and inventories. This would be the creds for the various git repos, any creds for running playbooks on servers in inventory, Ansible Vault credentials, and so on.
- Projects – In this case, your synced Git Repos.
- Inventories – The same as your Ansible Inventory, as synced from your git repo.
- (Job) Templates – Something that you may need to get used to is that in AWX we run “Templates“. A Template brings everything together: a playbook, an inventory, credential(s), and other parameters to run as a Job. Technically you are not “running a playbook” . . . I mean, you are, but that’s not how we refer to it in AWX since it’s much more than that.
Running Your First AWX Job
Assuming you are logged into AWX as Admin to your AWX Organization, let’s take this git repo that I built for Single Touch installs on HPE Synergy.
Adding Credentials
We’ll need to setup Credentials for it and bring the Repo in as a Project. One recommendation is to setup ssh keys for this, or use a long-term service account. Creating those accounts/keys for your repos goes beyond this post, so let’s just stick to the Credential Creation in AWX and assume the accounts have already been created on the repo.
IMPORTANT: You will need to add all the other creds needed for running all of this successfully, such as Ansible Vault Creds and usernames/passwords to any machines in inventory.
On the Left Navigation Pane (see previous screenshot), select Credentials and click the green button with a “+” to create a new credential.
Give the credential a unique Name, Description, Organization, and choose your Credential Type.
Note that in the Credential Type option list, there are quite a few. You would choose “Source Control” here for generic git repos of most types.
Also enter your Username and Password or your SCM Private Key if you have it setup:
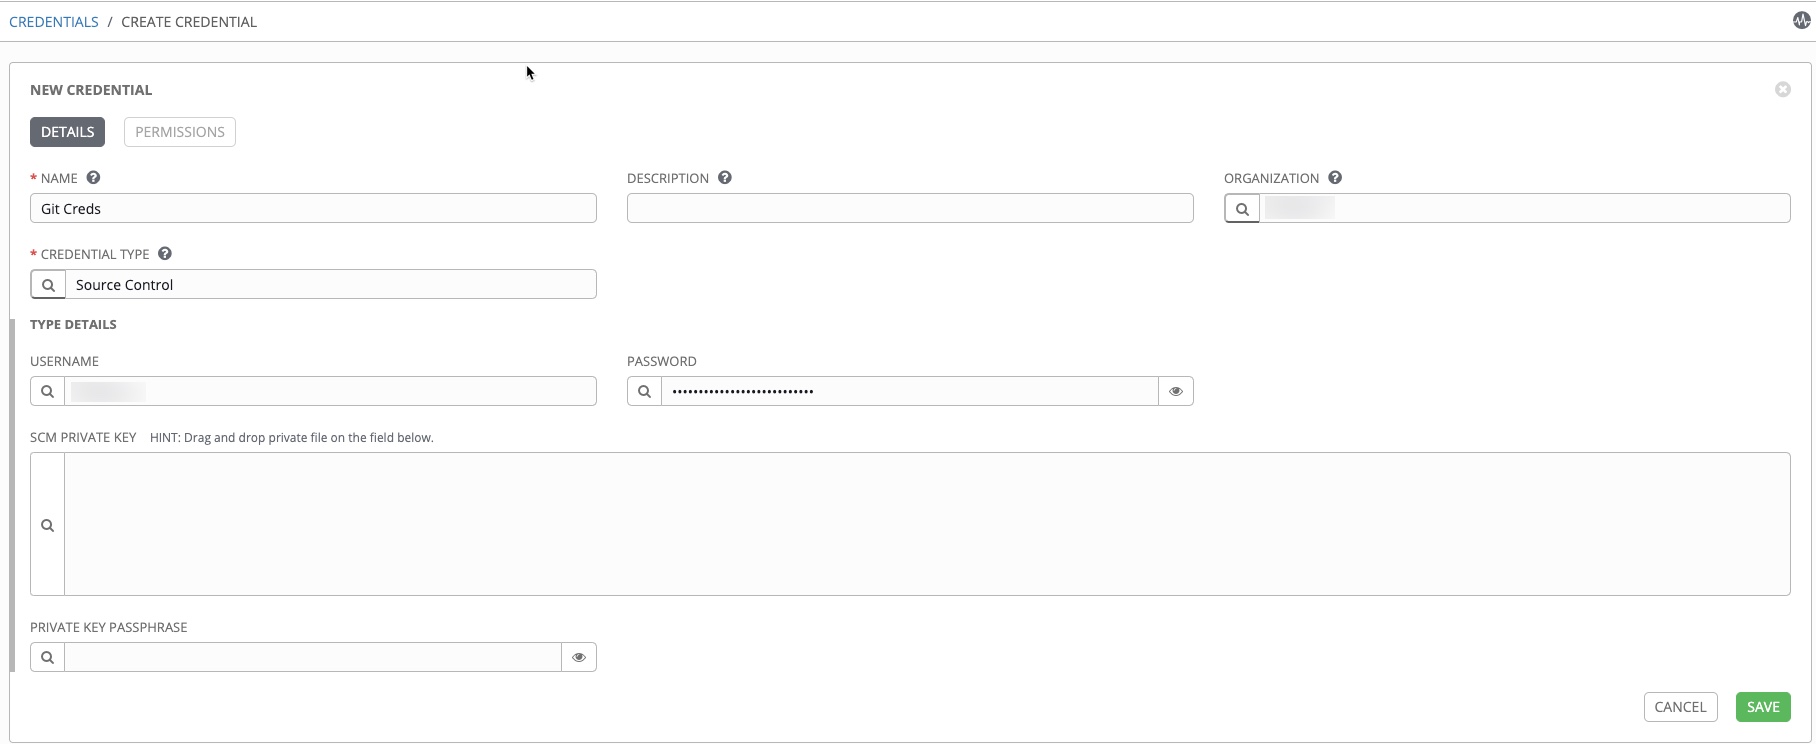
Then click Save.
Repeat this process for your Ansible Vault password and any other creds for use with the machines you are running this automation on.
Adding Projects (Git Repos)
On the Left Navigation Pane, select Projects and click the green button with a “+” to create a new project. . . . Are you sensing a pattern here?
Give the Project a Name, Description, Organization. We will use an SCM Type of “Git”. Then select the SCM Credential we created in the previous step:
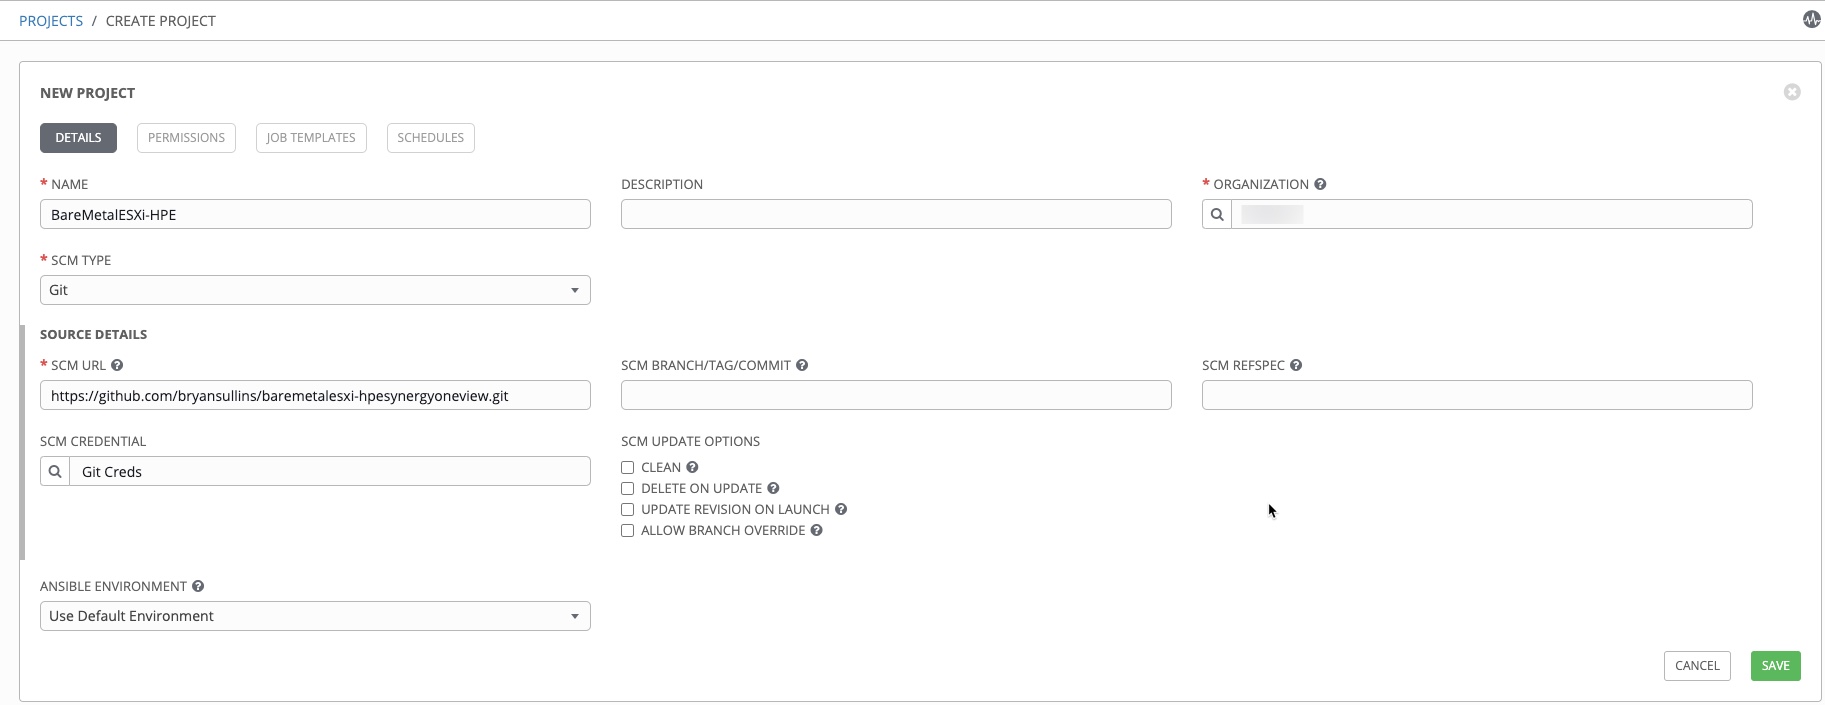
Note some pretty cool features here, like being able to specify a specific branch, and the ability to specify a virtualenv. You can also schedule the Project to sync at regular intervals through the Schedules button.
One last item is the ability to have the Git repo to sync every time something that uses the repo is launched (Update Revision on Launch).
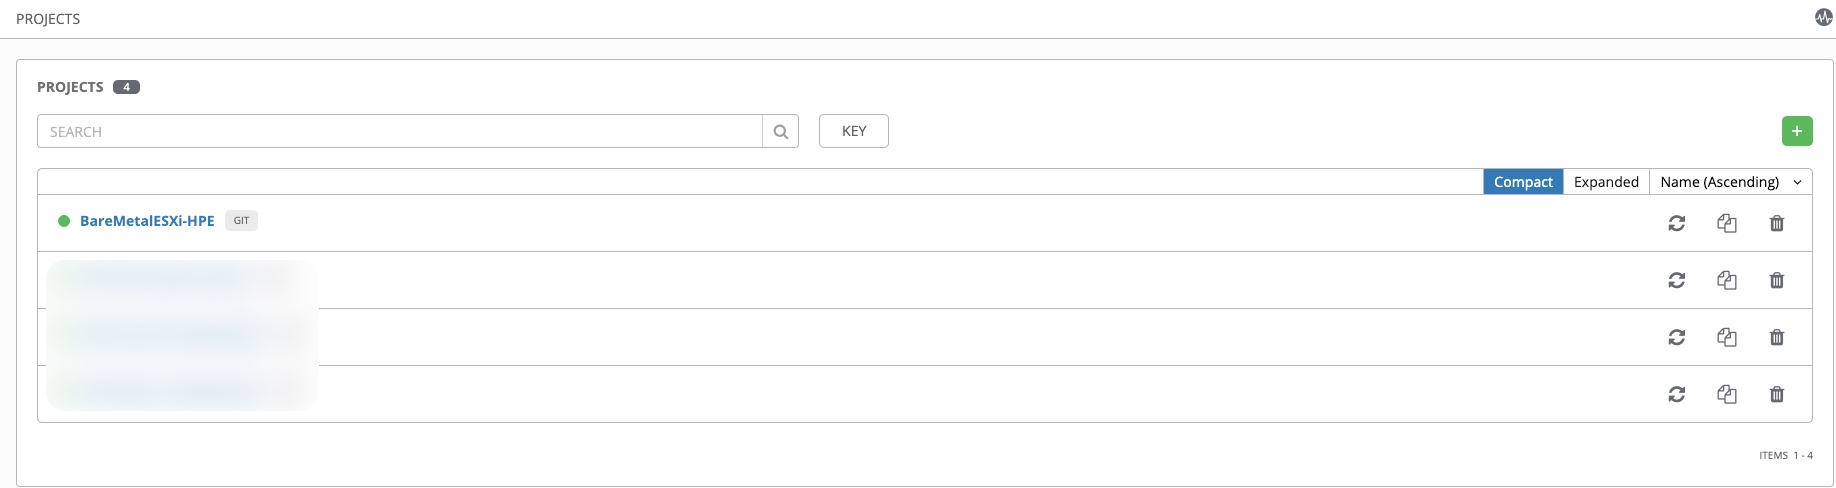
Once created, it will automatically sync from the repo once. You will know it because it will have a Green Dot next to it.
If you ever have to sync it manually, select the two arrow icon:
Adding Inventories
Now that we have things syncing, let’s specify an inventory from what is pulled in from the repo. Here, we are using a traditional inventory/hosts folder and file structure.
Here, we have to add the Inventory Name first, then specify the Source we are pulling from, so this one is actually two steps.
On the Left Navigation Pane, select Inventories and click the green button with a “+” to create a new Inventory.
Give it a Name, Description, Organization and click the Save button.
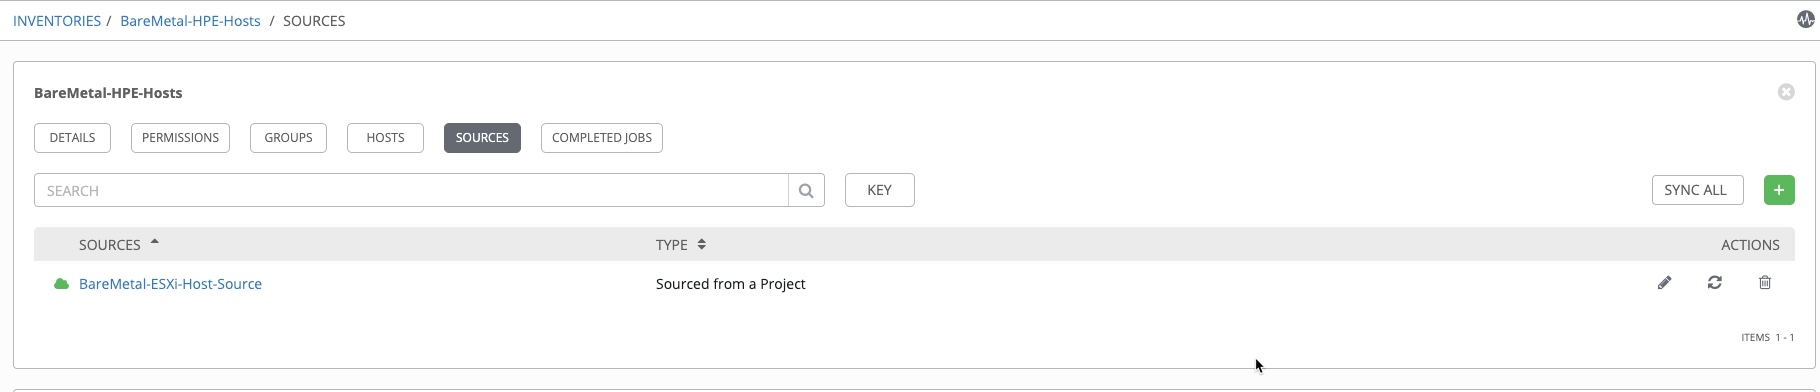
Now select the Sources button at the top of this new inventory you have created.
Add a new Source (I refuse to talk about the Green Button with the “+” anymore. You get it, right?).
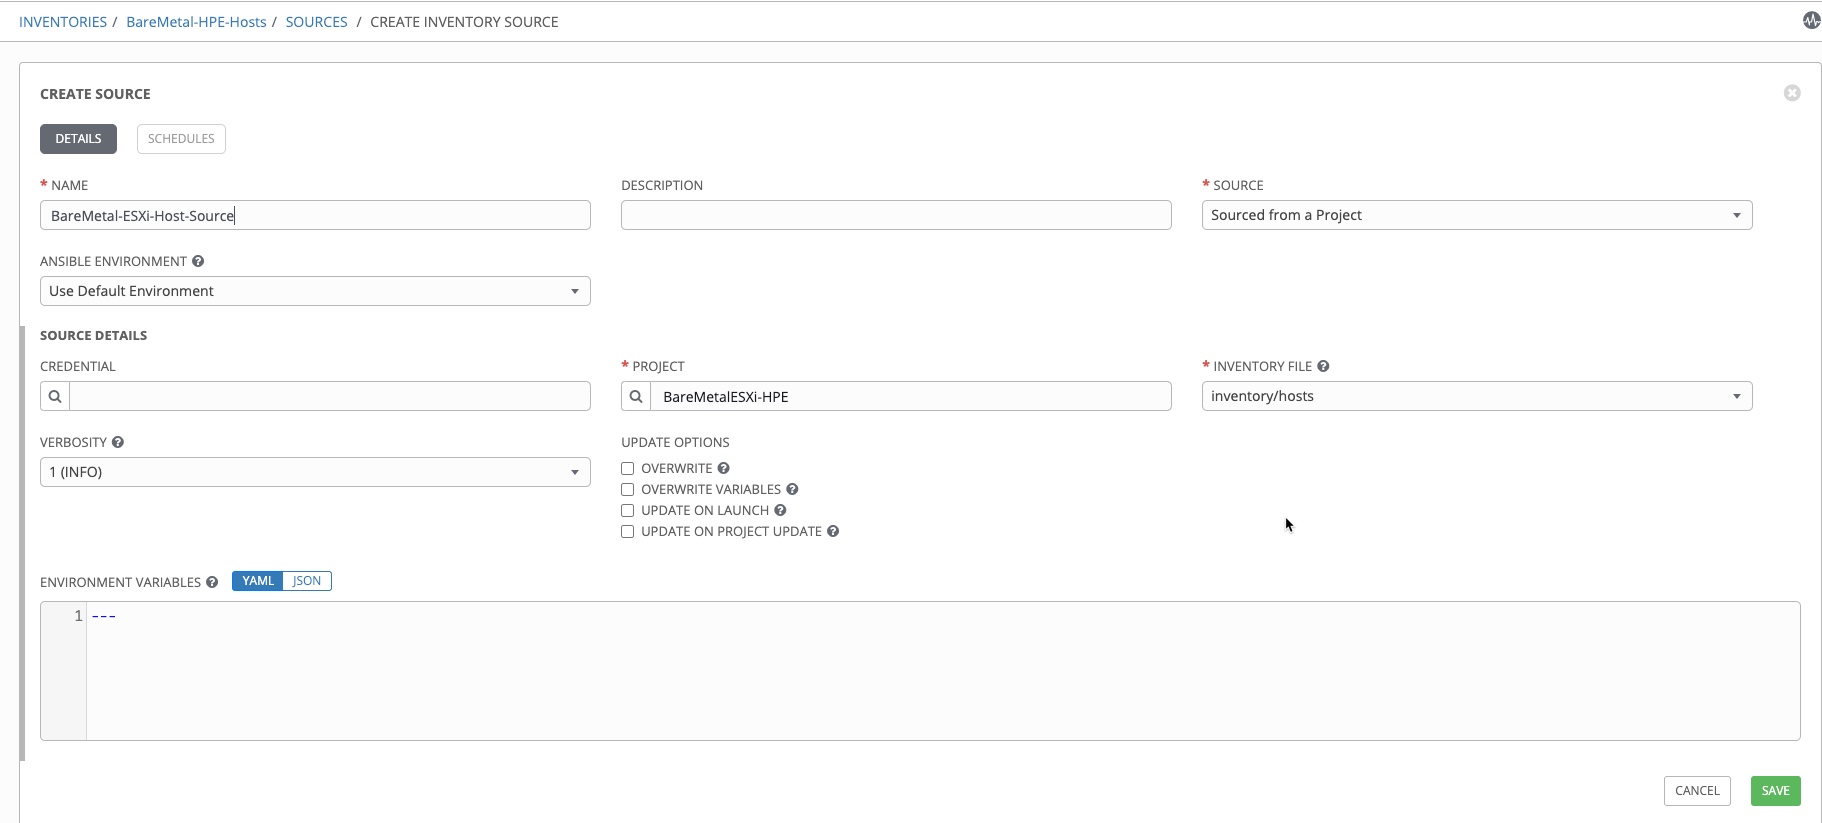
Give it a Name, Description, and under Source, select “Sourced from a Project“.
“Credential” here is for credentials you want to add that a pinned to the inventory, so it’s not required, but that’s up to you.
Select the Project repo we created earlier, and then select your Inventory File, in this case inventory/hosts:
Once created, make your way back to the Inventory you have created and select the Sources Button. You will notice here that you can sync that as well:
Bringing It All Together with a Job Template
The culmination of what we’ve created is now to create the Job Template, which will be run as a Job.
On the Left Navigation Pane, select Templates and click the green button with a “+” to create a new Job Template.
Give it a Name, Description, Job Type (take the default), Inventory, Project, and select the Playbook file from the repo:
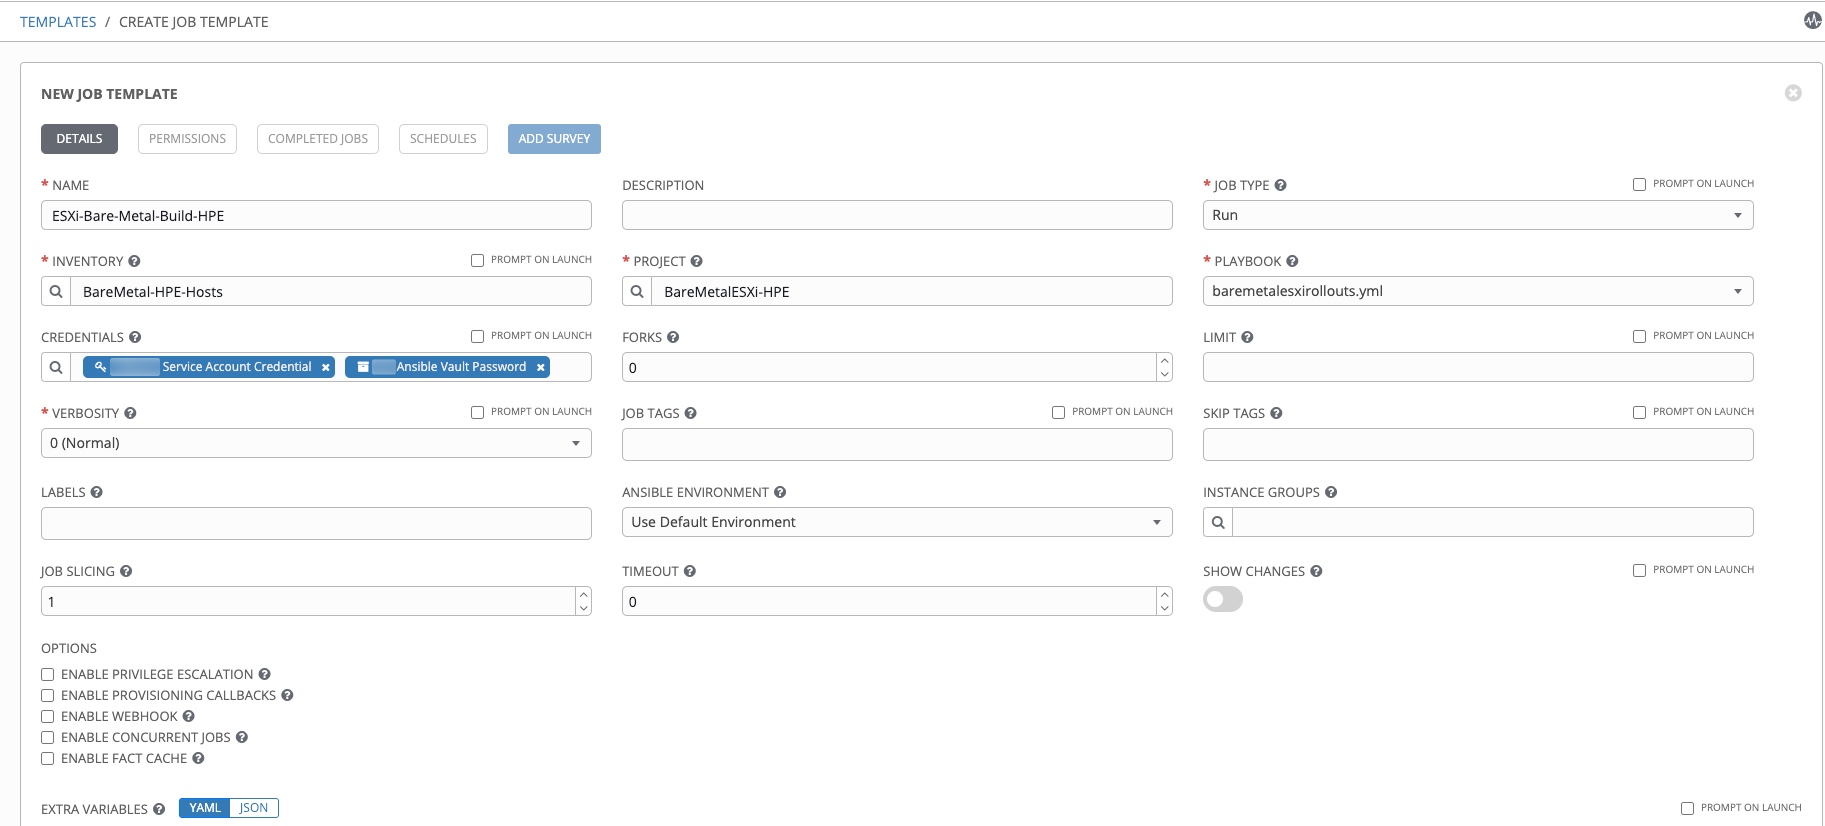
Then click the Save button.
This should all be coming together for you now.
Ansible Prompts and Surveys: A Take on “It Should Just Run Bruh”
You should know by now TOCers (does that work?), that you aren’t getting out of here without at least one of my pontifications.
Before we close this out with running the Job, I feel compelled to talk you about the concept of prompts in Ansible and AWX Surveys.
If you have attended any of my talks, you have probably heard my take on Ansible Prompts. I agree whole-heartedly that, where possible, prompts should be avoided. You should do your best to eliminate prompting altogether, or at least minimize its use. Why? Because humans are flawed. You can usually eliminate prompts by pulling and setting Ansible Facts from known-good sources.
However, bare metal rollouts pose a special challenge. Can zero prompts be achieved for bare metal rollouts? Sure, assuming you have the proper infrastructure and playbook logic in place, but if you don’t have that, it’s going to be quite difficult to pull facts from something that doesn’t exist yet.
Anyway, AWX Surveys make prompting easier, or these inputs can be specified as part of an API call.
You’re welcome.
If you notice in the playbook I have specified, I have a section for Ansible prompts (vars_prompt). If you Click the Survey button, you can enter in the prompts you need and the Job will run unhindered after that:

I am not going to go into detail about this because it’s pretty straightforward, but note that you can make drop downs here, essentially creating a UI for your automation that has minimized erroneous input.
Pretty neat!
Running the Job
Now click on Templates on the Left Navigation Screen and click the Rocket next to the Template we just built:
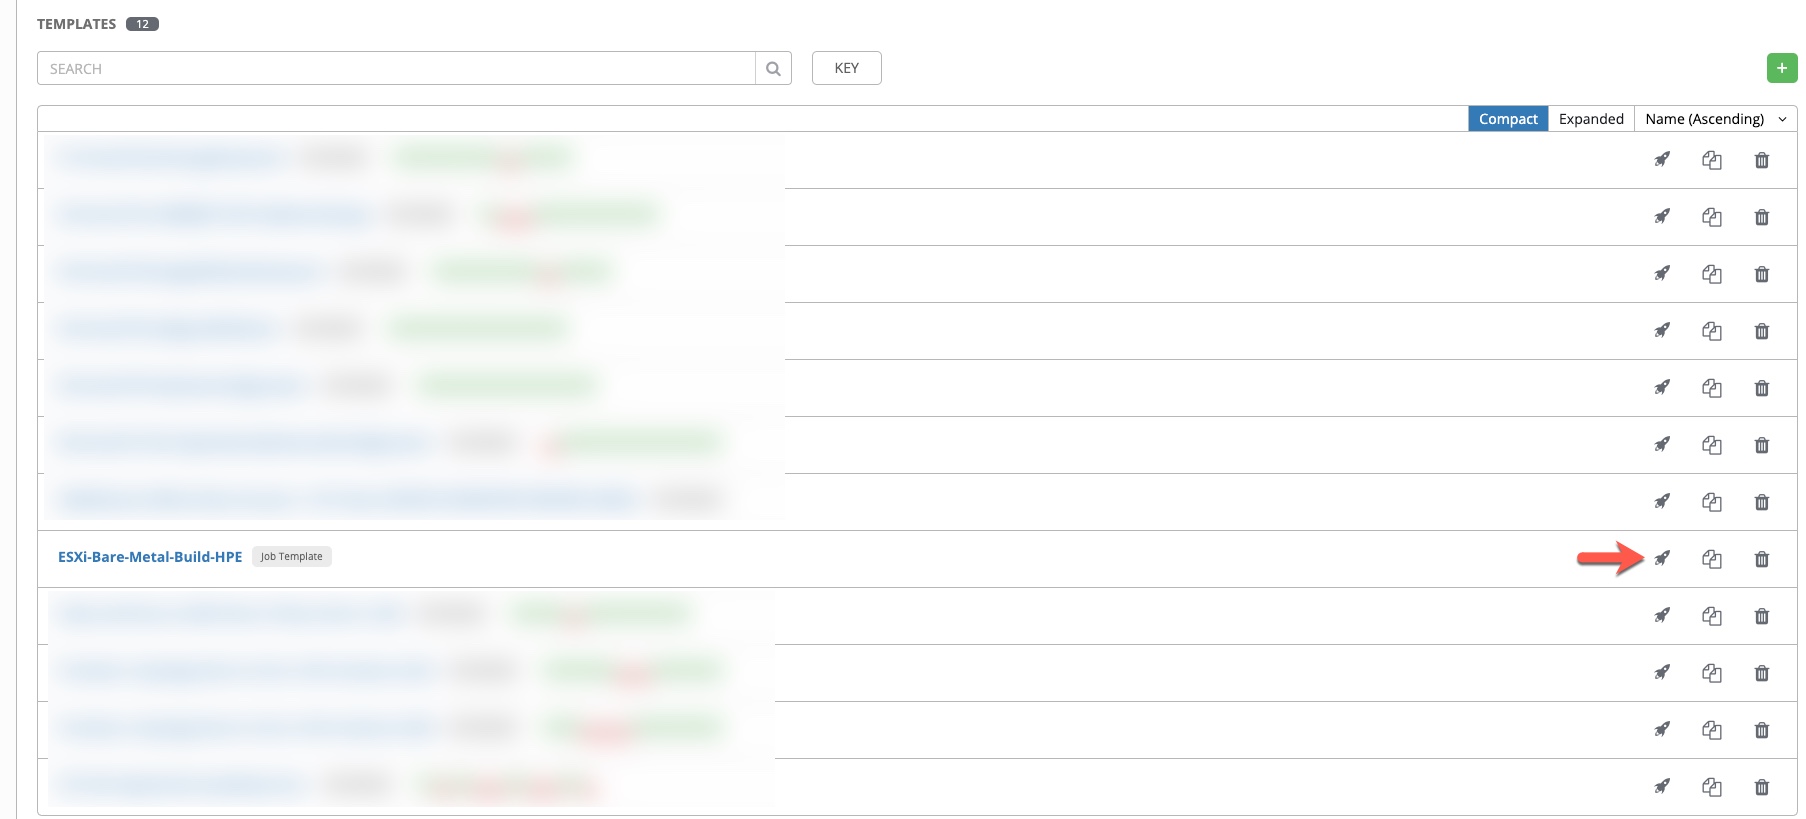
Side Note: AWX has become such a part of our automation strategy, when we announce new automation available in AWX, we call it “Rocket Ready” . . . because we’re dorks.
Once you click the Rocket, the Survey will launch. Enter the information, then click Next. You can then verify the inputs and then click the Launch button.
I don’t have a screenshot of this because the repo I am using is empty, but, I am sure you have a great imagination. I mean, you follow my blog don’t you?
Watching the Job Run
Once you launch the Template, you can see it run in the Jobs section of the Left Navigation pane. This gives you the ability to monitor the running job as if you were running it through the Ansible CLI. My apologies for the blurred sections here, but this is from one of our actual Jobs. Just note the items you can monitor here and note that the output is not unlike what we see when running Ansible locally:

Thus ends Post number 37. Happy AWXing!
Hit me up on twitter @RussianLitGuy or email me at bryansullins@thinkingoutcloud.org. I would love to hear from you.
