So here we are. Part 4. Parts 1-3 go through a definition of what Kubernetes really is and what resources you can use to learn K8s. I recommend you at least look at Part 3 where I list some requisite knowledge one should have before installing Kubernetes. It will definitely help you for this post.
The Usual Disclaimer Part
The disclaimer I have here is that I will be installing what is referred to as the “standalone version” of Tanzu Kubnernetes Grid. Because, like, it’s free . . . and stuff.
The integrated version has features like BOSH and NSX-T, and so on. That’s a whole different blog post altogether.
One good thing you will get out of this, if you have the resources, is a real Kubernetes set of clusters that can run real production Kubernetes workloads. I found that even with trying to learn Kubernetes, Minikube and home labs were just too limited.
So, lucky for me I had a proof-of-concept to build with TKG at work anyway, so I had enterprise-grade hardware at my disposal. You will need a vCenter with at least one ESXi host.
For reference, the instructions I am using below are a modified version of this documentation.
What’s that you say? “Why don’t I just use that, Bryan?”
BECAUSE I TELL YOU WHAT PITFALLS YOU CAN RUN INTO! I hope to save you some pain by giving you advice from my trials and tribulations.
What You’ll Need (And Spelling Out the Process):
- I used vCenter 6.7.0 U3 – I believe U2 is the minimum version, but I am too lazy to look it up right now. Your bootstrap machine will need to have access to this vCenter, along with admin permissions.
- Download the TKG Base OS Image and upload it to your intended vCenter.
- Create an SSH key for use with the cluster and its nodes, which is described here.
- You will need a machine from which to bootstrap everything TKG-related. We will call this the “bootstrap machine”:
- My bootstrap machine is a Mac Catalina 10.15.7.
- kubectl on your bootstrap machine.
- Install the tkg command line tool on your bootstrap machine.
- Docker Desktop on the bootstrap machine – v20.10.2.
- ***IMPORTANT – You can use a Linux machine, however with what we are doing here you’ll need a machine with a GUI. Otherwise you will have to stand up the Kubernetes cluster with a config file. I did that for giggles. It was not fun, but if you want to automate this process, that might be one way of doing it I suppose. Here, we are doing it the, “I WILL CLICK BUTTONS AND FILL OUT TEXTBOXES, YES I WILL” way.
- You will need a Static IP for the Supervisor cluster. In fact, as of this writing, all TKG Clusters of any type will need a static IP.
What’s This Whole Bootstrapping Business of Which You Speak, Bryan?
Haha! See! That’s why you read my blog, right? They don’t talk about this in the documentation (OK, they kind of do, but don’t explain why), but TKG literally needs a staging area where the Kubernetes infrastructure is bootstrapped and then copied into and/or built into its destination vCenter. This is where Docker Desktop (at least in this example here) comes in.
You will see evidence of this if you take a look at the scrolling text after you start the process. You will see that later in this post.
Why do we need this? I am assuming this has to do with TKG using Cluster API, which is worth a read. As I understand it, Cluster API is a Kubernetes-compliant method for creating/managing clusters that is separately defined for life cycle management of the underlying Kubernetes clusters.
Let Us Begin
The following are the steps to create the TKG Supervisor (aka Management) Cluster, and for your reference, some of the prep-work is here.
First, you will need to download the TKG image you will need to launch nodes. This is basically a VMware-certified Photon-based template for use with TKG to build TKG nodes. This process is best described here. It’s an OVA file and you’ll simply import it like you would any other OVA.
DON’T FORGET TO CONVERT IT TO A TEMPLATE. Why do I say that? Well, let’s just say a certain someone didn’t do that and could not figure out why TKG couldn’t find it! That was 20 minutes I’ll never get back!
Once the image is in vCenter and converted to a template, you can move on to the next step.
Next, we will need to create an SSH Public Key pair. That process is described here, but we’ll go ahead and do it as part of this process:
#> ssh-keygen -t rsa -b 4096 -C "email@example.com"
Then add it into your ssh agent:
#> ssh-add ~/.ssh/id_rsa
Open the public version of the rsa key so you can paste it in when you build your supervisor tkg cluster.
#> more ~/.ssh/id_rsa.pub
And finally, we’ll create the Supervisor Cluster for TKG. This cluster simply manages all other K8s clusters. It is not recommended to run production workloads in this cluster. We will cover the creation of additional workload clusters (we’ll call them) in Part 5.
The easiest way to create the TKG supervisor cluster, especially if this is your first time at it, use the tkg ui to build the cluster. Make sure Docker Desktop is running, otherwise you will get an error that the docker daemon is not running:
#> tkg init --ui
Logs of the command execution can also be found at: /var/folders/q3/8n6t92310z57kls181mbfz940000gp/T/tkg-20210313T185319745150397.log
Validating the pre-requisites…
Serving kickstart UI at http://127.0.0.1:8080
This should automagically launch the configuration UI in your default browser:
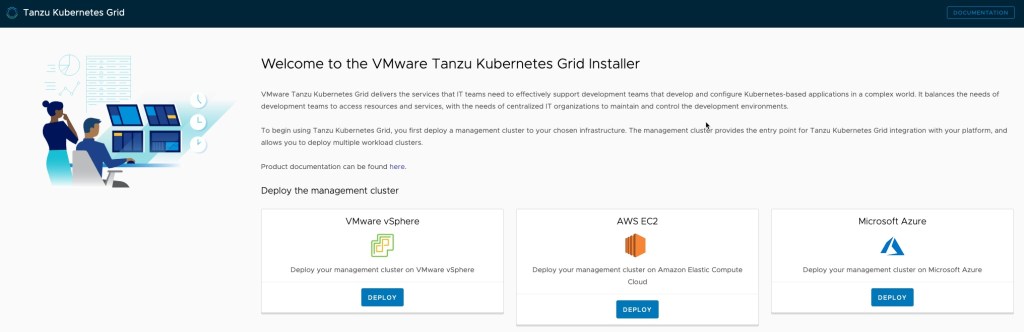
We are going to deploy TKG on VMware vSphere, so click that DEPLOY button.
From here, it’s simply entering the proper information. Values are not included here since that will depend on your environment, I am just listing off the information you’ll need:
- IaaS Provider:
- VCENTER SERVER
- USERNAME
- PASSWORD
(CLICK CONNECT) - DATACENTER
- PASTE IN THE SSH Public Key
- Management Cluster Settings
- DEVELOPMENT OR PRODUCTION (the difference is number of nodes). I will be doing DEV here because this is not a production cluster.
- MANAGEMENT CLUSTER NAME
- VIRTUAL IP ADDRESS
- WORKERNODE INSTANCE TYPE
- Metadata
- LOCATION
- DESCRIPTION
- LABELS
- Resources
- VM FOLDER
- DATASTORE
- CLUSTERS, HOSTS, AND RESOURCE POOLS
- OS Image
- SELECT THE AFOREMENTIONED Photon image (should be auto-detected).
- CEIP Agreement
- YOUR CHOICE
Click NEXT and then click REVIEW CONFIGURATION.
Once you have confirmed the settings, click DEPLOY MANAGEMENT CLUSTER and watch TKG come to life.
ZOMG HERE WE GO!
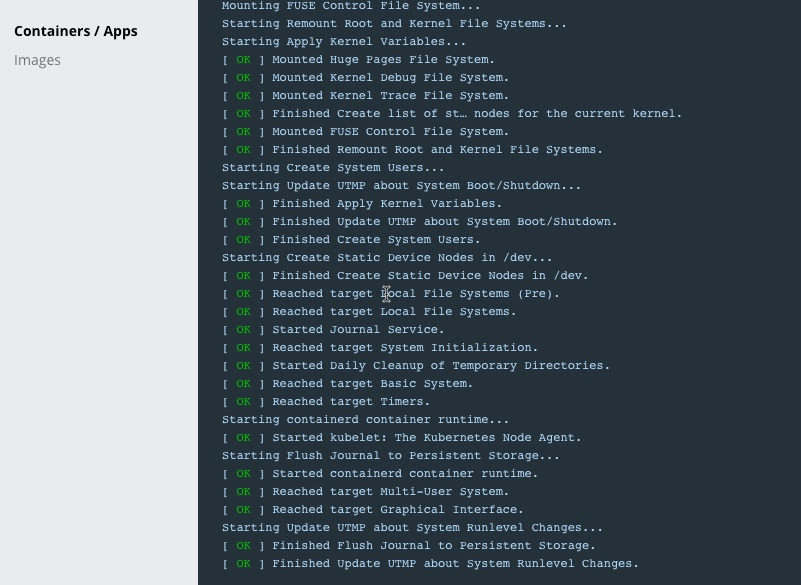
If you want to see what’s happening under the hood, you can open up your Docker Desktop and watch it bootstrap:

Select the kind container above and then you can see its actions:
The UI will also give you logs and progress:
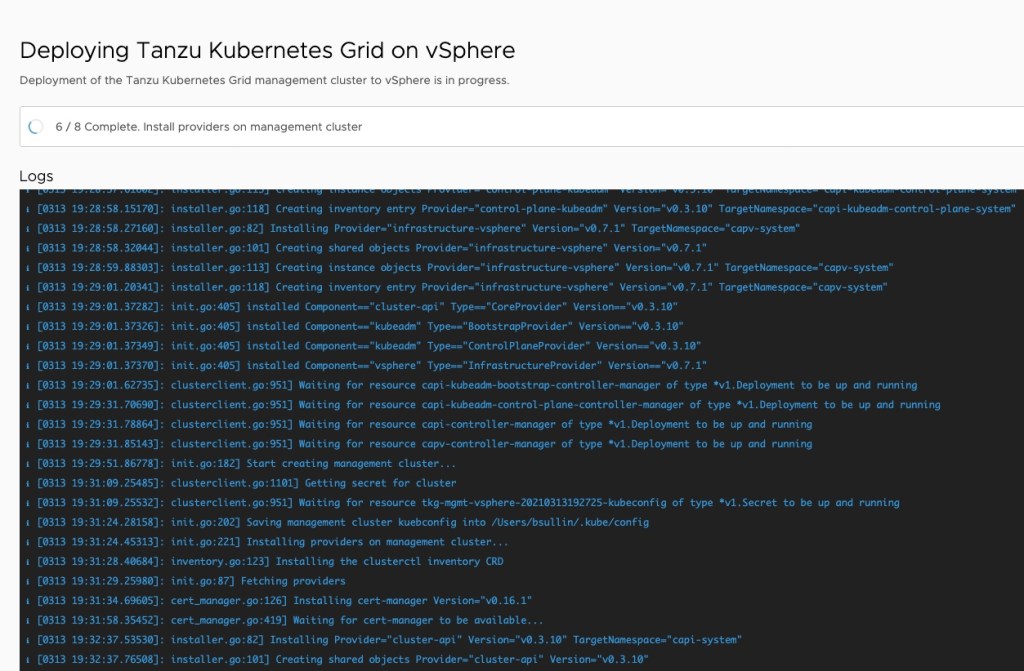
Here are the messages from the creation of the TKG Cluster:
Validating the pre-requisites...
Serving kickstart UI at http://127.0.0.1:8080
Validating configuration...
web socket connection established
sending pending 2 logs to UI
Using infrastructure provider vsphere:v0.7.1
Generating cluster configuration...
Setting up bootstrapper...
Bootstrapper created. Kubeconfig: /Users/FUSER/.kube-tkg/tmp/config_yTiyPoyc
Installing providers on bootstrapper...
Fetching providers
Installing cert-manager Version="v0.16.1"
Waiting for cert-manager to be available...
Installing Provider="cluster-api" Version="v0.3.10" TargetNamespace="capi-system"
Installing Provider="bootstrap-kubeadm" Version="v0.3.10" TargetNamespace="capi-kubeadm-bootstrap-system"
Installing Provider="control-plane-kubeadm" Version="v0.3.10" TargetNamespace="capi-kubeadm-control-plane-system"
Installing Provider="infrastructure-vsphere" Version="v0.7.1" TargetNamespace="capv-system"
Start creating management cluster...
Saving management cluster kuebconfig into /Users/FUSER/.kube/config
Installing providers on management cluster...
Fetching providers
Installing cert-manager Version="v0.16.1"
Waiting for cert-manager to be available...
Installing Provider="cluster-api" Version="v0.3.10" TargetNamespace="capi-system"
Installing Provider="bootstrap-kubeadm" Version="v0.3.10" TargetNamespace="capi-kubeadm-bootstrap-system"
Installing Provider="control-plane-kubeadm" Version="v0.3.10" TargetNamespace="capi-kubeadm-control-plane-system"
Installing Provider="infrastructure-vsphere" Version="v0.7.1" TargetNamespace="capv-system"
Waiting for the management cluster to get ready for move...
Waiting for addons installation...
Moving all Cluster API objects from bootstrap cluster to management cluster...
Performing move...
Discovering Cluster API objects
Moving Cluster API objects Clusters=1
Creating objects in the target cluster
Deleting objects from the source cluster
Context set for management cluster (REDACTED).

Management cluster created!


You can now create your first workload cluster by running the following:

  tkg create cluster [name] --kubernetes-version=[version] --plan=[plan]
I have redacted some of the information above, but you should get the point. Now you can switch to the context (as above) and use kubectl like you would for any kubernetes cluster.
kubectl cluster-info
Kubernetes master is running at https://X.X.X.X:6443
KubeDNS is running at https://X.X.X.X:6443/api/v1/namespaces/kube-system/services/kube-dns:dns/proxy
Had to clean up the IPs there because I don’t want you hacking my system here, as it were. Guess you’ll have to trust me that it works!
You can also plugin the usual kubectl commands to see what’s created:
#> kubectl get ns
NAME                                STATUS   AGE
capi-kubeadm-bootstrap-system       Active   18h
capi-kubeadm-control-plane-system   Active   18h
capi-system                         Active   19h
capi-webhook-system                 Active   19h
capv-system                         Active   18h
cert-manager                        Active   19h
default                             Active   19h
kube-node-lease                     Active   19h
kube-public                         Active   19h
kube-system                         Active   19h
tkg-system                          Active   18h
tkg-system-public                   Active   19h
tkg-system-telemetry                Active   18h
Also, you should see that vSphere created the nodes. Since this is a dev cluster, there is only one control plane node and one worker node:

In case you don’t believe me:
#> kubectl get nodes
NAME                                                    STATUS   ROLES    AGE   VERSION
tkg-mgmt-vsphere-[REDACTED]-control-plane-frdh8     Ready    master   19h   v1.19.1+vmware.2
tkg-mgmt-vsphere-[REDACTED]-md-0-74c9f58f9d-7hj6m   Ready    <none>   19h   v1.19.1+vmware.2
Take a look at all those pods!
#> kubectl get po --all-namespaces
NAMESPACE                           NAME                                                                          READY   STATUS      RESTARTS   AGE
capi-kubeadm-bootstrap-system       capi-kubeadm-bootstrap-controller-manager-555959949-wplgd                     2/2     Running     0          19h
capi-kubeadm-control-plane-system   capi-kubeadm-control-plane-controller-manager-55fccd567d-2jjsk                2/2     Running     0          19h
capi-system                         capi-controller-manager-dcccc544f-nm2m2                                       2/2     Running     0          19h
capi-webhook-system                 capi-controller-manager-84fd8774b6-6vhf2                                      2/2     Running     0          19h
capi-webhook-system                 capi-kubeadm-bootstrap-controller-manager-5c4886bf78-qqpcw                    2/2     Running     0          19h
capi-webhook-system                 capi-kubeadm-control-plane-controller-manager-85578c464c-7wcbr                2/2     Running     0          19h
capi-webhook-system                 capv-controller-manager-66bd87d667-8hf77                                      2/2     Running     0          19h
capv-system                         capv-controller-manager-6cd6b9c454-jn6m8                                      2/2     Running     0          19h
cert-manager                        cert-manager-556f68587d-xmkwj                                                 1/1     Running     0          19h
cert-manager                        cert-manager-cainjector-5bc85c4c69-7h4br                                      1/1     Running     0          19h
cert-manager                        cert-manager-webhook-7bd69dfcf8-d6nhg                                         1/1     Running     0          19h
kube-system                         antrea-agent-ccjc5                                                            2/2     Running     0          19h
kube-system                         antrea-agent-l6ngb                                                            2/2     Running     0          19h
kube-system                         antrea-controller-5d594c5cc7-ghksd                                            1/1     Running     0          19h
kube-system                         coredns-5bcf65484d-9djjk                                                      1/1     Running     0          19h
kube-system                         coredns-5bcf65484d-k9fcv                                                      1/1     Running     0          19h
kube-system                         etcd-tkg-mgmt-vsphere-20210313192725-control-plane-frdh8                      1/1     Running     0          19h
kube-system                         kube-apiserver-tkg-mgmt-vsphere-20210313192725-control-plane-frdh8            1/1     Running     0          19h
kube-system                         kube-controller-manager-tkg-mgmt-vsphere-20210313192725-control-plane-frdh8   1/1     Running     0          19h
kube-system                         kube-proxy-pt4xj                                                              1/1     Running     0          19h
kube-system                         kube-proxy-xfwxg                                                              1/1     Running     0          19h
kube-system                         kube-scheduler-tkg-mgmt-vsphere-20210313192725-control-plane-frdh8            1/1     Running     0          19h
kube-system                         kube-vip-tkg-mgmt-vsphere-20210313192725-control-plane-frdh8                  1/1     Running     0          19h
kube-system                         vsphere-cloud-controller-manager-25zhg                                        1/1     Running     0          19h
kube-system                         vsphere-csi-controller-555595b64c-mhmhd                                       5/5     Running     0          19h
kube-system                         vsphere-csi-node-8f9j5                                                        3/3     Running     0          19h
kube-system                         vsphere-csi-node-9prl2                                                        3/3     Running     0          19h
tkg-system-telemetry                tkg-telemetry-1615701600-6x69g                                                0/1     Completed   0          16h
tkg-system-telemetry                tkg-telemetry-1615723200-thw57                                                0/1     Completed   0          10h
tkg-system-telemetry                tkg-telemetry-1615744800-4j78g                                                0/1     Completed   0          4h36m
Next time, I promise we’ll delve more into kubectl and launch an app!
Questions? Hit me up on twitter @RussianLitGuy or email me at bryansullins@thinkingoutcloud.org. I would love to hear from you.
Also, please checkout my non-IT-related podcast Bicoastal Boozecast, with Episodes released every two weeks. Occasional swearing.
